January 2016
Monthly Archive
January 20, 2016
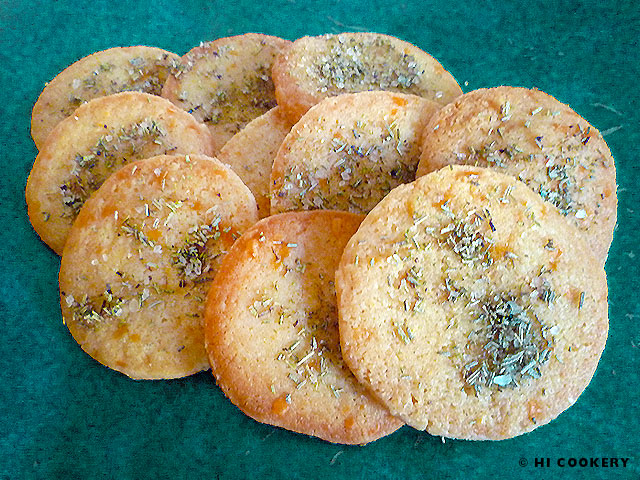
Cheese Sablés with Rosemary Salt
January 20: National Cheese Lovers Day
Snack on something a little more sophisticated than Cheetos or Cheez-Its. Try homemade cheese sablés with rosemary salt. Sablés, which are similar to crackers, are actually crisp French butter cookies (also known as Breton biscuits) that originated from Normandy.
This recipe version is savory instead of sweet and has a distinctive Parmigiano-Reggiano plus sharp cheddar taste that cheese lovers are sure to appreciate. The rosemary and sea salt topping complements the cheesy flavors well.
On National Cheese Lovers Day, savor some cheese sablés with rosemary salt.
Recipe
(Adapted from Food and Wine)
Ingredients
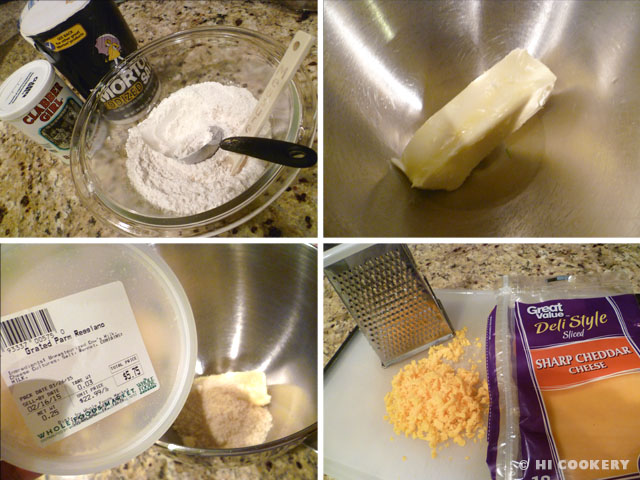
- 1 ½ cup plus 2 tablespoons self-rising flour (see Notes)
- 7 tablespoons butter unsalted, softened
- ½ cup Parmigiano-Reggiano, finely grated
- 1/3 cup sharp cheddar, shredded
- pinch of cayenne pepper
- 1 tablespoon rosemary, chopped
- ½ teaspoon sea salt
Directions
In a food processor or blender, combine the flour, butter, cheeses and cayenne pepper and pulse until a crumbly dough forms.
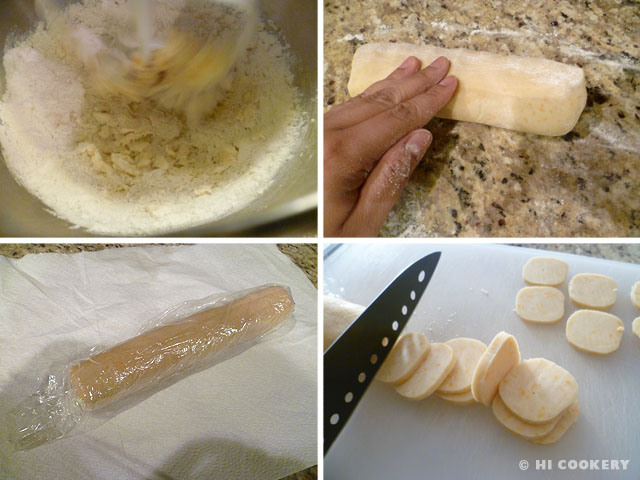
On a lightly floured surface, roll the dough into a log about 1 ½ inches thick. Wrap in plastic film and put in the refrigerator for about an hour or until firm. Remove the chilled dough from the refrigerator, unwrap and slice into 1/8 thick rounds. Place on a cookie sheet lined with parchment paper about two inches apart.
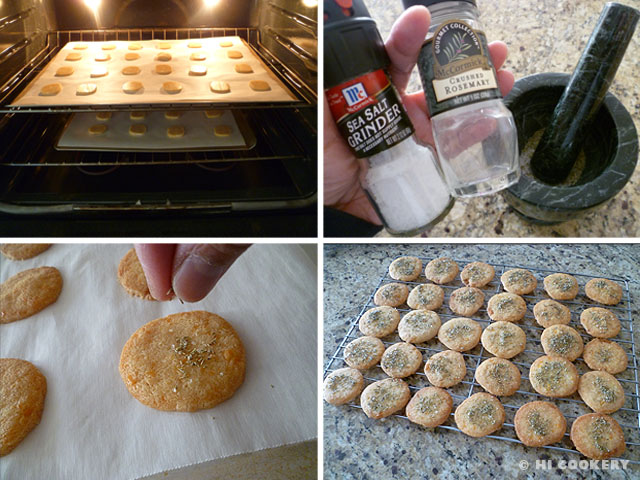
Bake in a preheated oven at 350 degrees F in the middle rack for 12-15 minutes or until golden. While the sablés are baking, pound the rosemary and sea salt in a mortar until fine. Remove the sablés from the oven and sprinkle them immediately with the rosemary salt mixture. Let the sablés cool on the cookie sheets for another five minutes then transfer them to a wire rack to cool completely.
Notes
- Make your own self-rising flour by combining 1 cup flour, ½ teaspoon salt and 1 ½ teaspoons baking powder. For this recipe, use 1 ½ cup flour, ¾ teaspoon salt and 2 ¼ teaspoons baking powder.
- National Cheese Day is also observed June 4. Search our blog for additional recipes containing cheese as an ingredient and celebrate all things cheesy!
- Islander recommends taking lactase enzyme supplements if one has a cheese/dairy intolerance like her.
January 15, 2016
No-Churn Strawberry Ice Cream
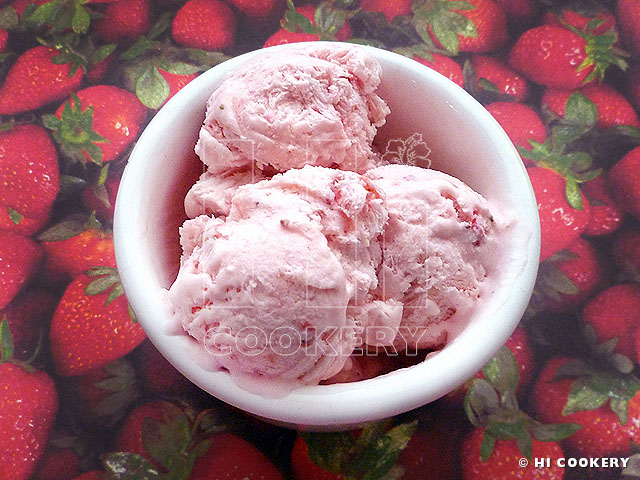
January 15: National Strawberry Ice Cream Day
Strawberry ice cream is typically a summertime treat. But even in the middle of January, when the weather is warm in Hawaii and in the southern hemisphere, eating ice cream to cool off is a “berry” good idea. Turn the winter blues into something pretty in pink and make chunky no-churn strawberry ice cream in observance of National Strawberry Ice Cream Day.
Recipe
(Adapted from WRLA.com)
Ingredients
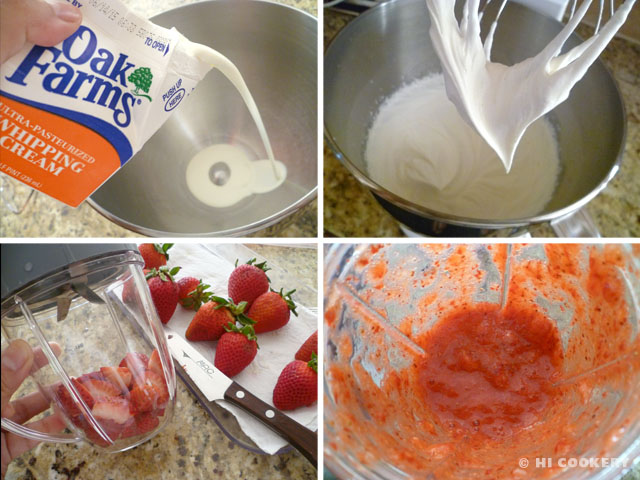
- 2 cups heavy whipping cream (cold)
- 1 cup pureed strawberries
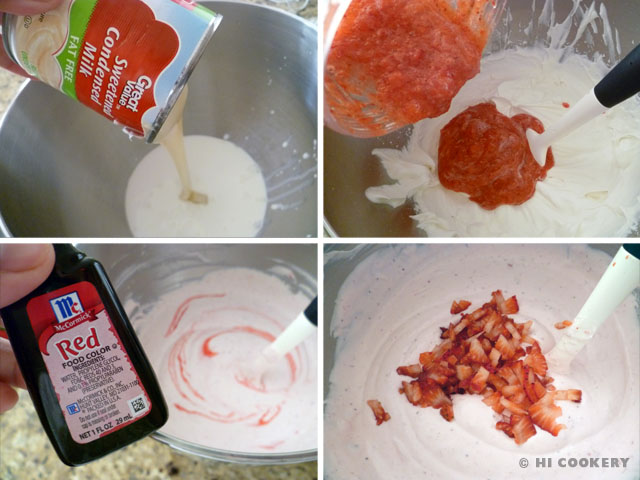
- 1 can (14 ounces) sweetened condensed milk
- ½ – 1 cup chopped strawberries
- a few drops of red food coloring (optional)
Directions
Beat the cream until stiff peaks form. Wash, dry and trim the tops off the strawberries. Puree the fruit. Chop additional strawberries and set aside.
In a large bowl, mix the condensed milk with the pureed strawberries. The mixture will turn pale pink. Fold the whipped cream into this mixture until smooth, being careful not to whip more air into it. Add a few drops of red food coloring and stir well until the desired color of pink is achieved (optional). Fold in the chopped strawberries until well blended.
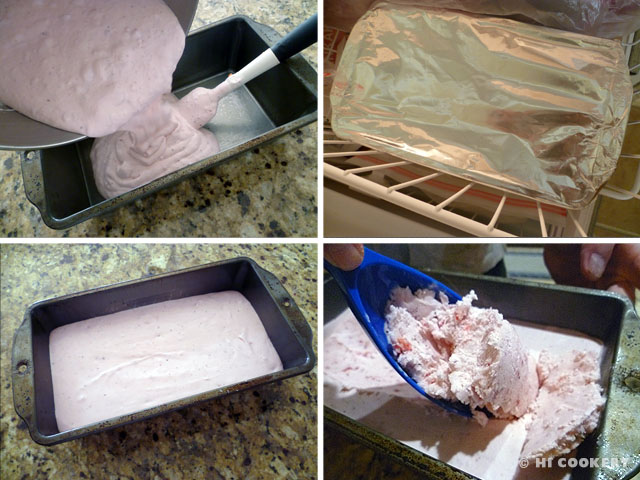
Pour the mixture into a loaf pan. Cover and freeze for at least six hours or overnight. Remove from the freezer. Let stand for a few minutes and scoop into cones or dessert dishes. Enjoy immediately.
Notes
- Add a teaspoon of strawberry extract to boost the strawberry flavor in this recipe. If using this extract, reduce the amount of red food coloring.
- National Ice Cream Month is in July—just half a year away. Get a head start with making no-churn ice cream by searching our blog for more recipes!
January 1, 2016
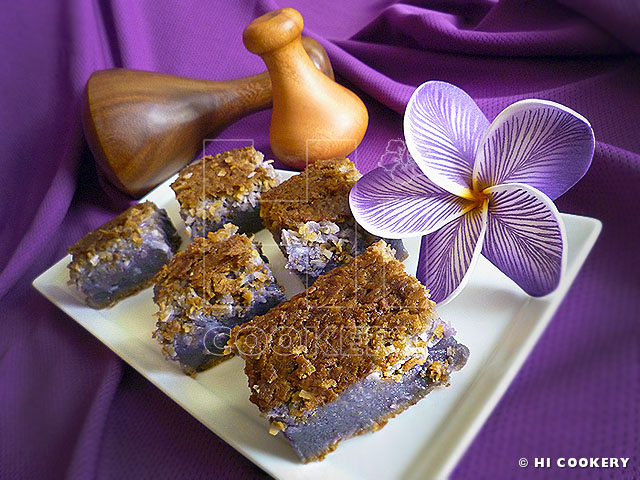
Baked Poi Mochi
January 1: New Year’s Day
Islander grew up eating Filipino bibingka during the holidays, special occasions and “just because” in Hawaii. Other Asian immigrants on the islands have a similar sweet treat, like Japanese mochi and Chinese gau, for the new year. The glutinous rice is considered an auspicious food. Its stickiness symbolizes that good luck would stick with you throughout the coming year.
In a Hawaiian twist, Islander added poi powder to the mochi and coconut flakes for a tropical taste. We let our haole neighbors try a little bit of poi mochi for a mainland mini makahiki. Some liked its novelty while others were not used to the gooey texture. At least they tried something new for the new year!
Bake poi mochi for the new year and may good luck stick around! Hauoli makahiki hou.
Recipe
(Adapted from Taro Brand)
Ingredients
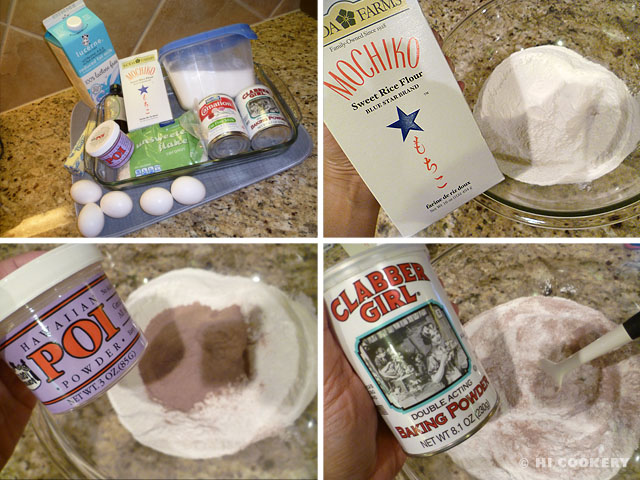
- 2 cups mochiko (sweet rice flour)
- ½ – ¾ cup poi powder
- 2 teaspoons baking powder
- 2 ½ cup sugar, granulated white
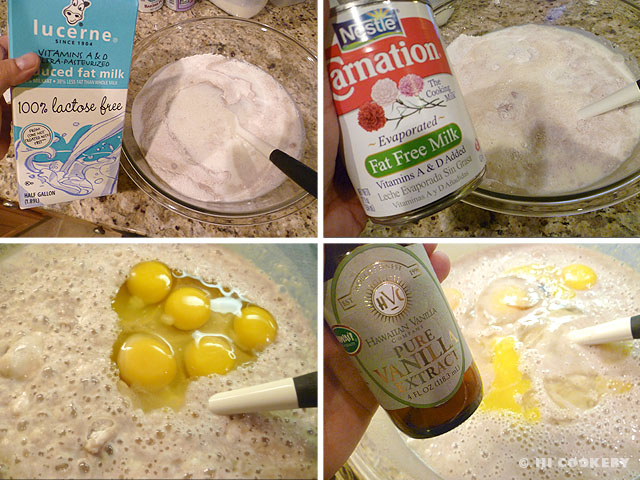
- 1 ½ cup milk
- 1 (14 ounces) can or 1 ½ cup evaporated milk
- 5 eggs
- 1 teaspoon vanilla
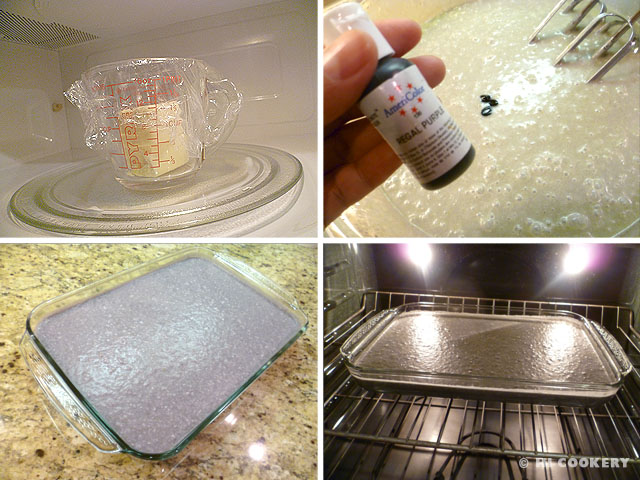
- ½ cup (1 stick) butter, melted
- purple food coloring (optional)
- 1-2 cup coconut flakes (we used unsweetened)
Directions
In a large mixing bowl, combine the mochiko, poi powder, baking powder and sugar.
Stir in the milk and evaporated milk. Beat in the eggs. Add the vanilla extract.
Melt the butter and cool slightly. Stir into the mixture. Tint with purple food coloring if desired. Fold in the coconut flakes. Pour into a lightly greased 9×13-inch pan. Bake in a preheated oven at 350 degrees F for 45 minutes to an hour. Check for doneness with a toothpick. Remove from the oven and cool completely before slicing into 24 squares with a plastic knife. Store leftovers in a tightly sealed container.
Notes
- The coconut flakes tend to rise to the top in this recipe, making the crust brown and crunchy. As the top can burn easily, place the pan in the middle or lowest rack in the oven.
- There are deep-fried versions of poi mochi balls that Islander likes to eat when she finds them while in Hawaii. This baked custard-like version is simpler to make.
- Mahalo nui loa to Islander’s brother who gifted us with the wooden model poi pounders pictured above.
- Search our blog for other recipes containing poi as an ingredient.
- Happy new year to all our blog readers!
Next Page »
