Ube Bibingka
(Filipino Purple Yam Sweet Sticky Rice Cake)

January 1: New Year’s Day
Islander’s Auntie Laarni C., who once had a small catering business in Hawaii, would sometimes drop by our house to wish us a Happy New Year in person. Fortunately for the family, she would also bring her signature pancit palabok (noodles are a lucky new year food as they represent long life), lumpia (egg rolls or spring rolls in the winter months mean hope for the coming spring season) and bibingka (sweet sticky rice cakes are also auspicious, symbolizing luck “sticking” around in the new year).
One year, she showed up with ube bibingka instead of the usual butter mochi cake. Auntie Laarni’s favorite color is purple—and Filipino purple yam yields a vibrant hue in the batter of this dessert. Now that she has grandkids, she no longer caters or cooks as much. So HI Cookery is continuing her tradition of making bibingka (sometimes with ube flavoring) for the new year. Happy New Year! Manigong Bagong Taon!
Recipe
(From Auntie Laarni C.)
Ingredients
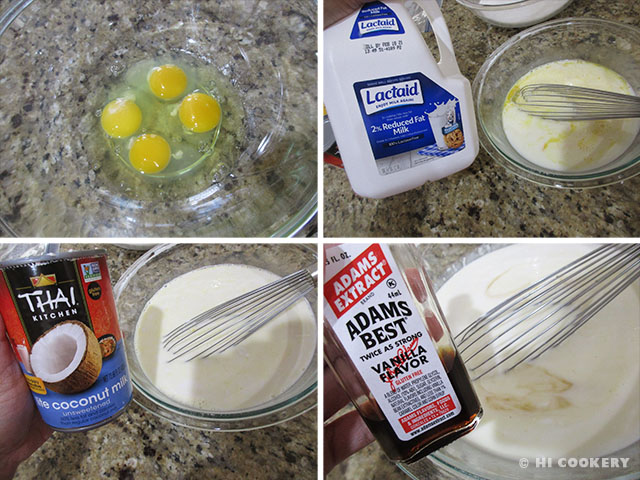
- 4 eggs
- 2 cups milk
- 1 can (13.5 ounces) coconut milk
- 1 teaspoon vanilla
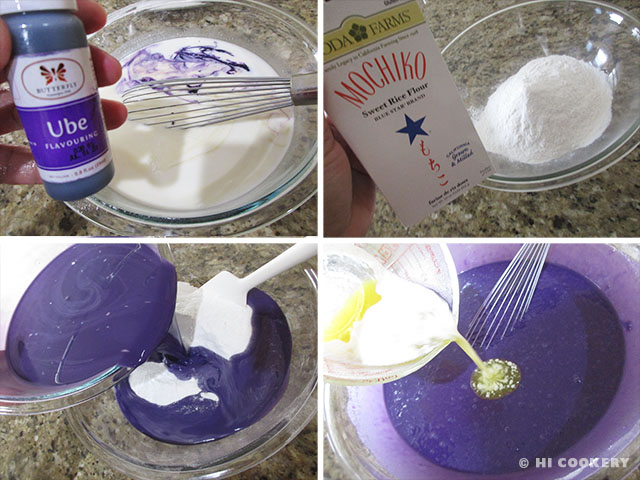
- 2 teaspoons ube flavoring or extract
- 1 box (16 ounces) sweet rice flour (mochiko)
- 2 teaspoons baking powder
- ½ teaspoon salt
- 1 ½ cups sugar, granulated white
- ½ cup unsalted butter, melted
Directions
In a medium bowl, stir together the eggs, milk, coconut milk and vanilla.
Add the flavoring/extract. In a large bowl, combine the mochiko, baking powder, salt and sugar. Pour the egg mixture into the flour mixture. Stir well until it is evenly bright purple. Add the melted butter. Mix well.
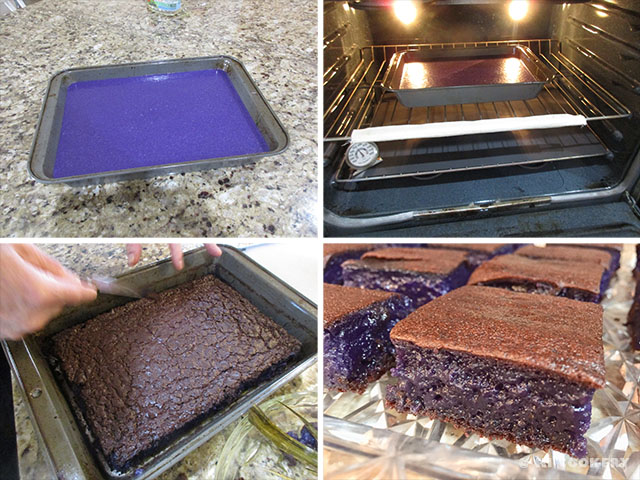
Pour into a 9×13 baking pan lined with parchment paper or oiled banana leaf. Bake in a preheated oven at 350 degrees F for 50-60 minutes or when the top is browned. Remove from the oven and let cool completely. Invert onto a cutting board. Peel off the parchment paper or banana leaf. Slice into squares and serve.
Notes
- We sometimes line our baking pan with a clean banana leaf to give it a distinct flavor (Auntie L does this with her other Filipino baked goods).
- Ube bibingka is similar to our baked poi mochi. Though both are made from root vegetables, ube is purple yam and poi is from taro.
- Search our blog for other New Year’s foods by clicking on the Theme Menus tab.