Arepas con Carne Mechada
September 15- October 15: Hispanic Heritage Month

A few years ago, we sponsored the marriage of Danielito and Elaine L. at a neighboring Catholic church in our area. The groom grew up in Venezuela and wanted to bring something special to share as an appreciative gesture at one of our marriage preparation dinner sessions. What a nice break for us from cooking and what a treat to try a new cultural food. He cooked a typical Venezuelan dish called arepas (corn cakes) filled with carne mechada (pulled beef), which is their version of a hearty sandwich. Before bringing the final food to us, he and his fiancé/now wife had practiced preparing it in his apartment several times until Danielito felt it was just right enough to share his recipe. It is also nice to know that this couple worked as a team to cook together, which bodes well in their married life.

Muchas gracias to Danielito for sharing his recipe with us! Venezuelan-style arepas con carne mechada make a good meal, especially during Hispanic Heritage Month.

Recipe

From Danielito L.

For the carne mechada (pulled beef)

  • 2 ½ – 3 pounds flank or skirt steak
  • 1 white onion, diced + 3 tomatoes, seeded + 1 bulb of garlic
  • 2 tablespoons of onion/tomato/garlic mix
  • 1 onion, diced
  • 5 cloves of garlic, minced
  • 1 tablespoon tomato paste
  • 1 tablespoon cumin powder
  • 1 tablespoon adobo power
  • 1 tablespoon annatto powder

Directions

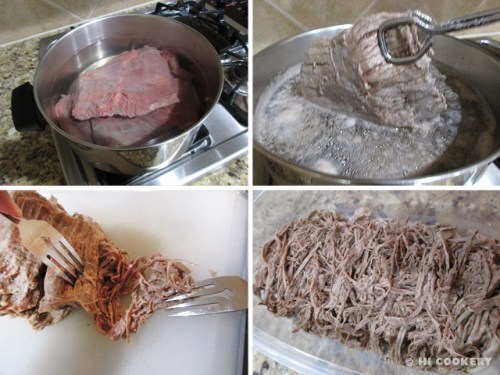
Prepare the beef by boiling the steak in water for about an hour or until it is soft enough to be pulled by hand. Use just enough water to cover the steak. Take the beef out, drain and let cool, reserving the beef froth for later. Shred the beef by pulling each individual strand.
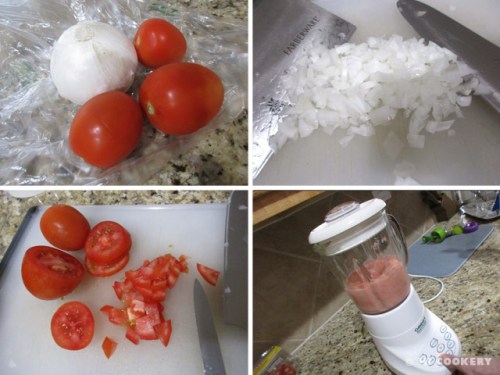
In a blender, puree the diced white onions, seeded tomatoes and bulbs of garlic until it is a paste-like consistency. Save this combination when making the beef filling.
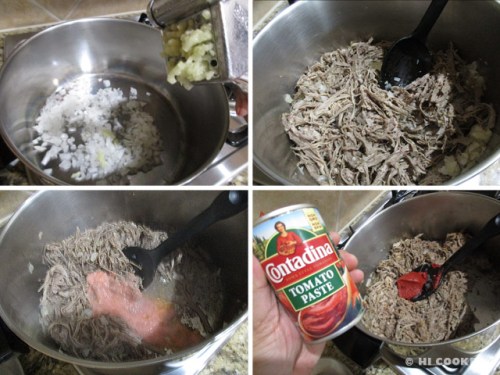
In a large pan, stir-fry the second diced onion with minced garlic until lightly brown. Lower the heat and add the shredded beef in the pan. Add the “onion/tomato/garlic” mixture. Stir in the tomato paste.
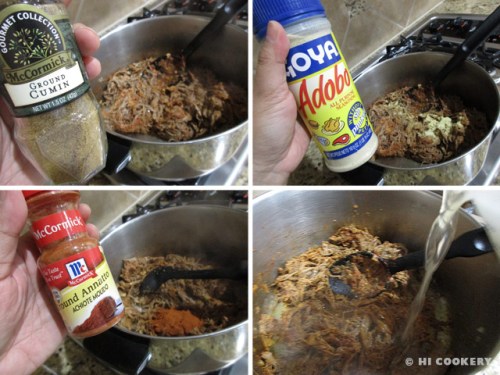
Sprinkle the meat with cumin, adobo and annatto powders. Mix everything together thoroughly. Add enough beef broth to cover the bottom of the pan. Stir and simmer in low heat, checking periodically to make sure the beef is not dry. Adjust spices to taste. Keep warm while making the arepas.
For the arepas

  • 1 cup arepa flour (precooked corn meal) [see Notes]
  • ½ – 1 teaspoon salt (optional)
  • 1 ¼ cup water
  • oil for cooking the arepas
  • shredded cheese (optional garnish)
  • chopped cilantro (optional garnish)

Directions

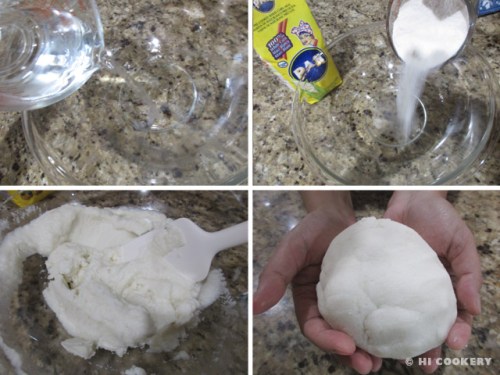
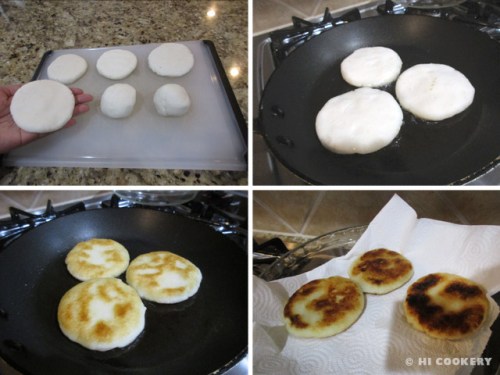
In a mixing bowl, place the arepa flour and salt (if using). Slowly mix in the water and stir well, making sure everything is absorbed. Let stand for five minutes. Divide into 6-8 pieces and roll into balls. Flatten to no more than ½ inch thick.
Under medium high heat, coat the bottom of a skillet with oil. To avoid splattering, carefully slip in a few pieces of the flattened dough and brown each side (takes at least five minutes). Flip over and continue to brown the arepas. Drain on paper towels.
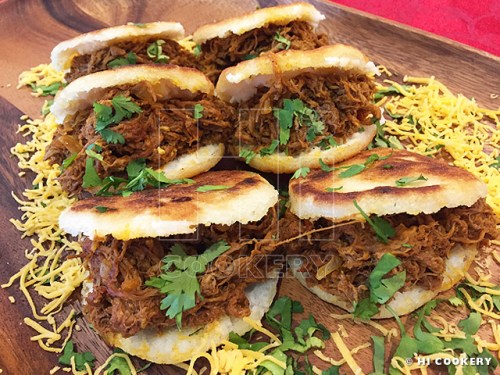
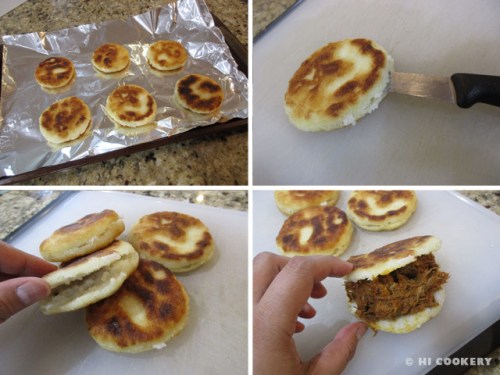
When ready to serve, slice in the middle but do not cut all the way to the other end. Open and fill with carne mechada. Serve with shredded cheese and chopped cilantro (optional garnish).
Notes

  • Arepa flour (also known as masarepa or harina precocida) is precooked corn meal and should not be confused with masa harina. Find this in the Latin aisle of the grocery store or in Latin markets.
  • Search our blog for other Latin-inspired recipes for Hispanic Heritage Month.

Almond Cross Cookies

September 14: Feast of the Exaltation of the Holy Cross (Holyrood Day)

We visited the Palace of Holyroodhouse when we honeymooned in Scotland more than two decades ago. It is the official residence of the British monarch when in Scotland and the site for state occasions and official entertaining. On the palace grounds are the ruins of an Augustinian abbey dated from the 12th century and named as Holy Rood/Black Rood by King David I, son of Queen Margaret, a Scottish saint, who was believed to own a relic of the True Cross on which Our Lord and Savior Jesus Christ was crucified. Holyrood is a special place to Highlander because this is where one of his ancient ancestors signed the chapel charter in 1127, the first official record of his clansman.

In the medieval Christian liturgical calendar, today is the Feast of the Exaltation of the Holy Cross, also known as Holyrood Day. We commemorated this feast day with almond-flavored cross-shaped cookies. When it was celebrated as a religious holiday, work was not permitted except for the gathering and collecting of nuts (thus, the almond flavor in these cookies). The 1709 edition of “Poor Robert’s Almanack” reads:

The devil, as the common people say,

 Doth go a nutting on Holy-rood day;

 And sure such leachery in some doth lurk, 

Going a nutting do the devil’s work.

Cross cookies can be made for christenings/baptisms, holy communions, ordinations, Lent/Easter and many other Christian celebrations, especially for the Feast of the Exaltation of the Holy Cross.

Recipe

(Adapted from Kitchen Lane)

Ingredients

  • 1 cup (2 sticks) unsalted butter, slightly softened
  • 1 cup granulated sugar
  • 1 egg
  • 1 tablespoon milk
  • 1 teaspoon almond extract
  • 3 cups flour (all purpose white)
  • ¾ teaspoon baking powder
  • ½ teaspoon salt
  • white fondant
  • powdered sugar for dusting the surface
  • clear piping gel or water
  • purple or other food coloring
  • white tube frosting
  • green tube frosting

Directions

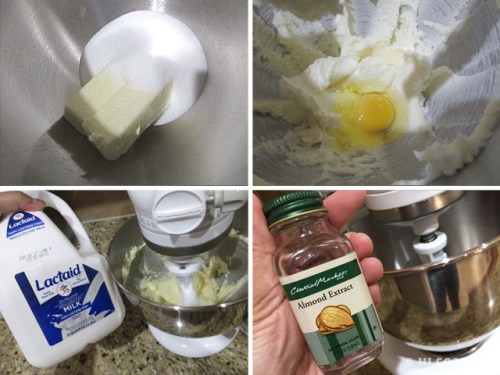
In a bowl, mix the butter with sugar until creamy. Beat in the egg and milk. Add the almond extract.

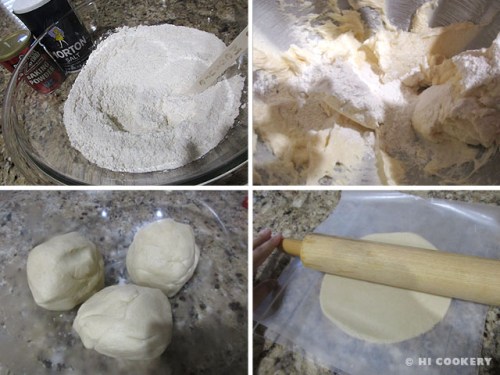
In a large bowl, stir together flour, baking powder and salt. Gradually add the flour mixture into the other ingredients and blend well to form a dough. Divide dough in thirds and roll into a ball. Then flatten each ball into a disc and place between sheets of waxed or parchment paper. Roll out to about ¼-inch thick (we used ¼-inch thick acrylic sticks as guides). Stack them on a baking sheet and refrigerate until firm (about 30-45 minutes). They may also be frozen for 15-20 minutes.

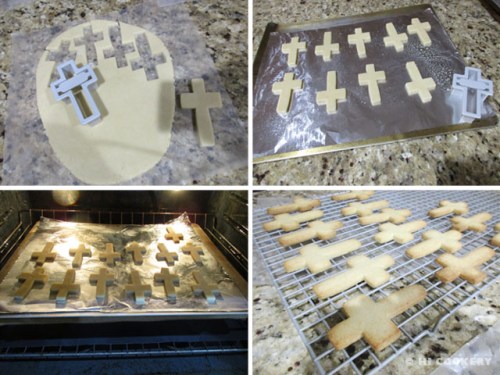
Take one stack of flattened dough out of the refrigerator or freezer. Peel away both front and back to loosen, leaving the dough on one sheet of the waxed or parchment paper. Cut out the cross shapes. Place on foil-lined greased cookie pan about 1 ½ – 2 inches apart. Refrigerate the cookie pan. Re-roll scraps of dough and cut more shapes, refrigerating if the dough gets too soft. The dough needs to be cold and firm in order to retain its cross shape. Bake the cookies in a preheated oven at 375 degrees F for 10-15 minutes or until the sides are very lightly browned. Remove from the oven when done and let sit on the pan for about five minutes. Transfer each cookie on a wire rack to cool completely. Store in an airtight container until ready to decorate.

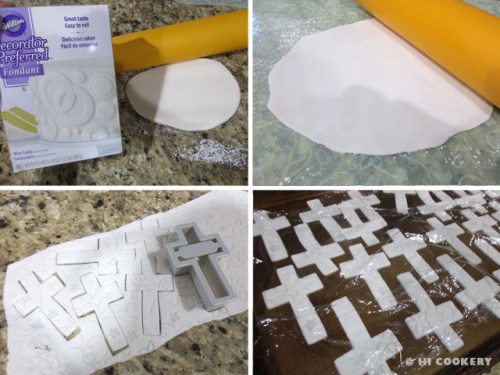
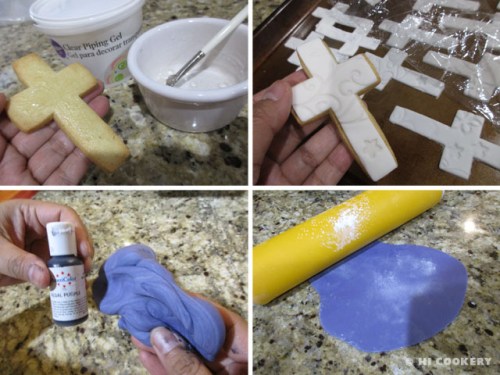
Using the same cross-shaped cookie cutter, cut out shapes on white fondant (roll out to 1/8-inch thickness on a clean surface that has been dusted with a bit of powdered sugar to prevent from sticking). Use a fondant impression mat, if adding decorative texture to the fondant is desired. Cover the fondant cross cutouts with plastic wrap to avoid them drying out while working on assembling the cookies.

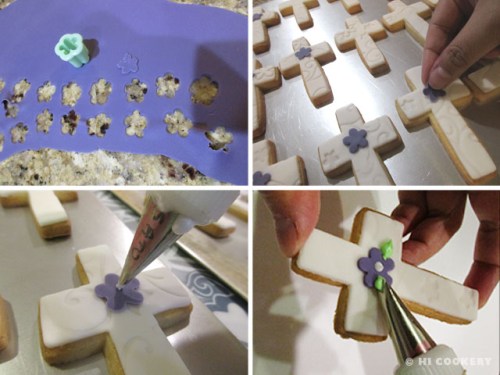
Brush water or piping gel on the cookie (see Notes). Position the fondant on top of the cross cookie and smooth out the edges with warm fingers. Repeat for all cookies. Set aside to dry. Tint some white fondant with purple or other food coloring. Roll out to 1/8-inch thickness on a clean surface that has been dusted with a bit of powdered sugar to prevent from sticking.

Use a small flower cutter to cut small flowers. Brush piping gel or water and position the flower in the middle of the cross cookie. Use the white tube frosting to pipe a round center in the middle of the fondant flower. Use the green tube frosting and a leaf tip to pipe leaves on the flowers. Let dry. Serve cross cookies on a platter.

Notes

  • For a nuttier taste, brush almond extract on the cookies in place of piping gel or water before positioning the fondant.
  • We used a fondant imprint mat from Wilton called “Graceful Vines”, which may be purchased online. If available in local craft stores, use a coupon to get a good discount like we did.
  • The cross is the iconic symbol of Christianity. Find “Glory in the Cross” from the Billy Graham Evangelistic Association’s web entry. The “Prayer of the Day” is appropriate for Holyrood Day and every day.


Easy Cheesy Pizza Pockets

September 5: National Cheese Pizza Day

Ah…mini pizza rolls and pizza pockets were one of our favorite afterschool snacks. They bring back childhood memories of coming home from school, settling down to relax/play and then snacking on them before tackling homework. Sure, the store-bought brands made it more convenient and quick for our moms to feed us hungry school kids. But homemade ones are just as easy to prepare ahead of time together as a family. Pizza pockets can be stuffed with favorite fillings that are not available from boxed brands, stored frozen and reheated in the oven whenever anyone wants a little something savory to eat. For National Cheese Pizza Day, we stuffed our snacks with plain shredded pizza cheese and waxed nostalgic about our childhood and the memories with our moms (dads and siblings) with whom we partook pizza pockets!

Recipe

Ingredients

  • Thin pizza dough (we used Wewalka brand)
  • Pizza sauce (we used Ragu brand)
  • Pizza cheese (we used Kraft brand)
  • 1 egg mixed with 1 teaspoon water for the egg wash

Directions

Unroll chilled pizza dough. Cut into 4×4” inch squares (we re-rolled the scrap to make five total squares).

Spread a little pizza sauce on each square, leaving about half an inch to the edge. Generously pile on the cheese (it will look bulky but melts down). Fold over and seal tightly with the tines of a fork.

Place on a sheet of waxed paper misted with cooking spray (or use parchment paper). Beat the egg with water and brush on the tops of the pizza pockets. Bake in a preheated oven at 425 degrees F for 15 minutes. Remove from the oven and serve hot. Be careful when biting into the pizza pockets as the hot cheese might ooze out and cause a burn.

Notes

  • Search our blog for other pizza recipes.