Solar Eclipse Sugar Cookies
August 21, 2017: Solar Eclipse Across the USA
On July 11, 1991, Islander was able to experience a solar eclipse in Hawaii. The path of 100% totality was over the Big Island, but 96% over Oahu was still a good percentage. Unfortunately, it was cloudy that day so the moving rain clouds kept interrupting the views for everyone, even at the observatories with the telescopes. Islander woke up at 6:30 a.m. (okay, NOT a morning person!) and started watching the TV news for coverage about the eclipse. Almost an hour later, she went out in the backyard, put on her sun peepers (79 cents at 7-11 convenience store) and watched the heavens above. At 7:28:48 a.m., the sky became dark gray, almost like dusk. Four minutes later, the sun peeked out again after the moon slowly finished crossing its path and a beautiful morning continued on to become another blessed day.
Today we experience partial totality in Texas at approximately 1:17 p.m. Highlander is working at that time but Islander baked cookies for his co-workers to commemorate the rare occasion that a solar eclipse happens across America. The last time it occurred on the mainland was on February 26, 1979; the next one will be on April 8, 2024.
Along with these solar eclipse sugar cookies, we are snacking on Sun Chips, Moon Pies and Moon Cheese, eating chicken salad “crescent” roll sandwiches, drinking Capri Sun apple juice and Sunny D orange juice and chewing Eclipse gum. These fun foods all make for a memorable meal when celebrating the solar eclipse!
Recipe
Ingredients
- Sugar cookie dough (we use the recipe from Kitchen Lane)
- Yellow fondant
- Black or dark chocolate fondant
Directions
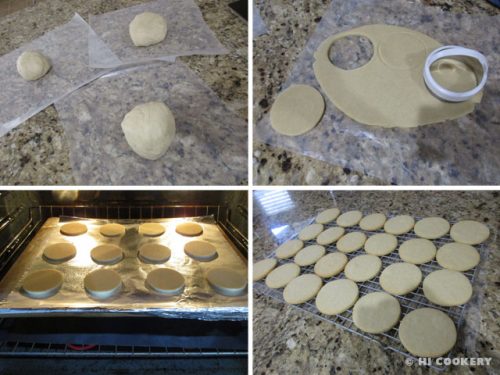
Make the sugar cookie dough. Roll out to 1/4 inch thick. Use a circle cookie cutter to cut out cookie shapes. Bake and cool.
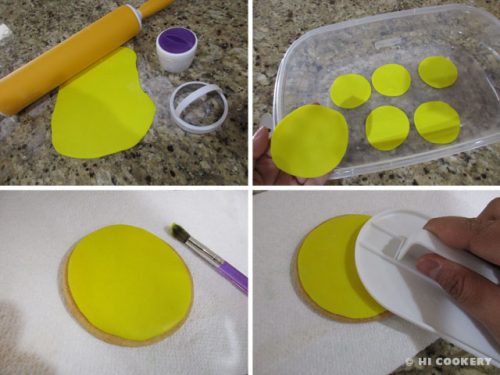
Decorate the round sugar cookies by rolling out yellow fondant 1/8 inch thick. Use the same circle cookie cutter to cut out shapes. Brush water on the top of a round cookie and place a yellow fondant circle on top. Smooth out the edges.
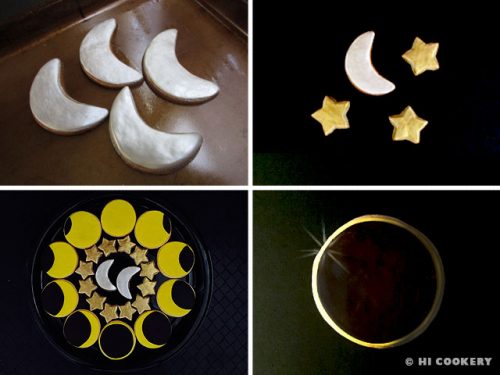
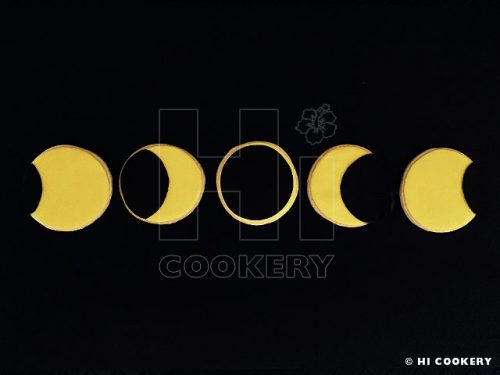
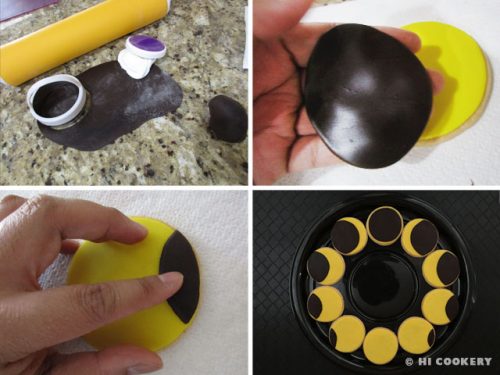
Roll out black or dark chocolate fondant 1/8 inch thick. Using the round cookie cutter, cut different shapes according to the partial moon shadows (quarter, half or ¾ full crescents). Brush water on the back and position it on top of the yellow fondant. Arrange in phases to show the gradual eclipse movements.
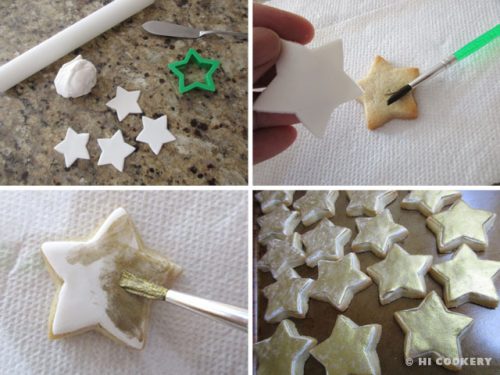
Bonus Recipe: Gold Star Cookies
Ingredients
- Extra cookie dough
- White fondant
- Clear extract (almond, lemon, etc.) or vodka
- Gold edible powder/non-toxic luster dust
Directions
With the extra cookie dough from above, roll out to ¼ inch thick. Use a small star cookie cutter to cut out star shapes. Bake and cool.
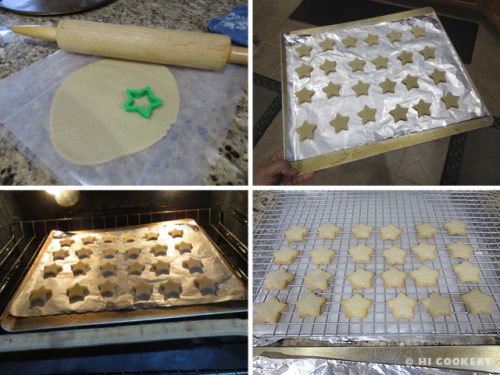
Roll out white fondant 1/8 inch thick. Use the same star cookie cutter to cut out shapes. Brush water on the top of a star cookie and place a white fondant star on top. Mix a little extract or vodka with gold edible powder. Brush over the star cookies. Let dry. Serve with solar eclipse sugar cookies.
Notes
- Also appropriate for a solar eclipse celebration are cinnamon-pecan crescent cookies and brown sugar shortbread star cookies.
- We also made some silver crescent moon cookies in the same manner as the gold star cookies above. We just substituted the colors and cookie cutter shapes. Combine these with the solar eclipse cookies for a celestial celebration!