January 2013
Monthly Archive
January 10, 2013
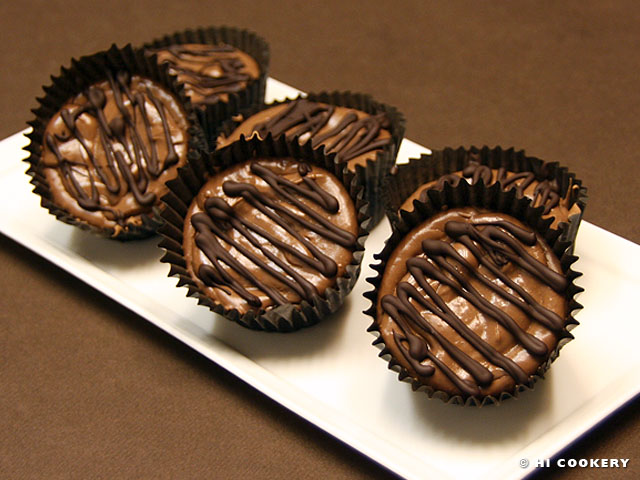
Bittersweet Chocolate
Cheesecake Cups
January 10: Bittersweet Chocolate Day
How much is too bitter in bittersweet chocolate for your tastes? When we sampled chocolates at a store a long time ago, we tried white chocolate (0%)* to unsweetened chocolate (100%) and others in between. The percentages reflect how much cocoa mass is included in the chocolate. The higher the percentage, the more intense and darker the chocolate. That percentage is lowered by the amount of sugar and dried milk solids added to the chocolate. Also, different manufacturers classify the percentages differently and label their chocolates as bittersweet, semi-sweet or extra-dark.
Highlander can tolerate up to 85% in his chocolate but that tastes too bitter for Islander. She prefers hers no more than 70%. So that is the chocolate percentage she used when baking bittersweet chocolate cheesecake cups (although she did drizzle the tops with a 54% chocolate to add a little sweetness and color contrast).
Try sampling the variations of chocolate percentages and see how high you prefer your bittersweet tooth. Then use that percentage to prepare bittersweet chocolate cheesecakes cups in celebration of Bittersweet Chocolate Day.
Recipe
(Adapted from Cookstr)
Ingredients
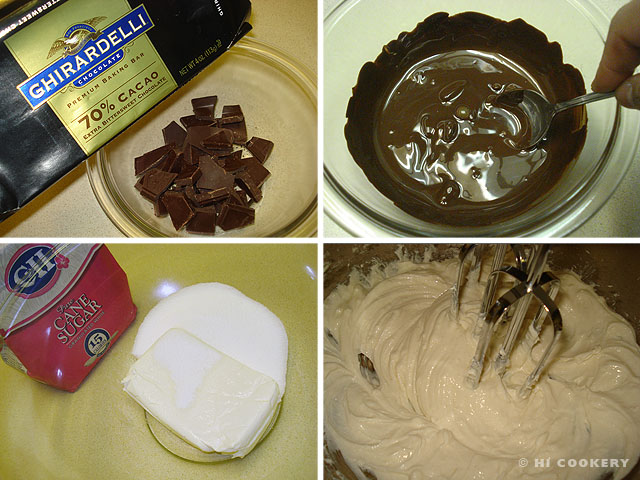
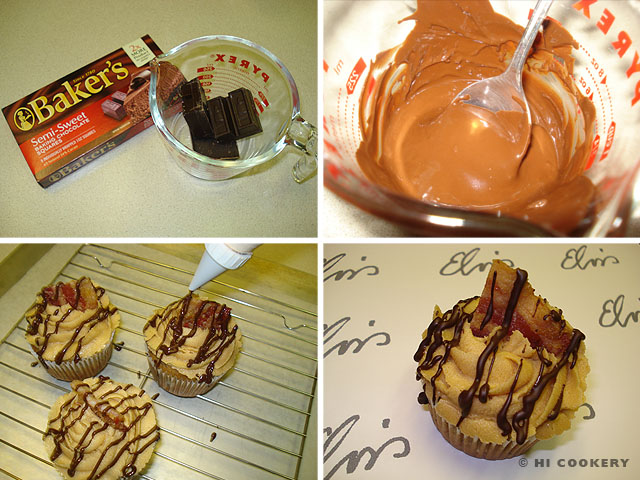
- 4 ounces bittersweet or semi-sweet chocolate (choose your percentage preference), melted
- 8-ounce block of cream cheese, softened
- 1/3 cup sugar, granulated white
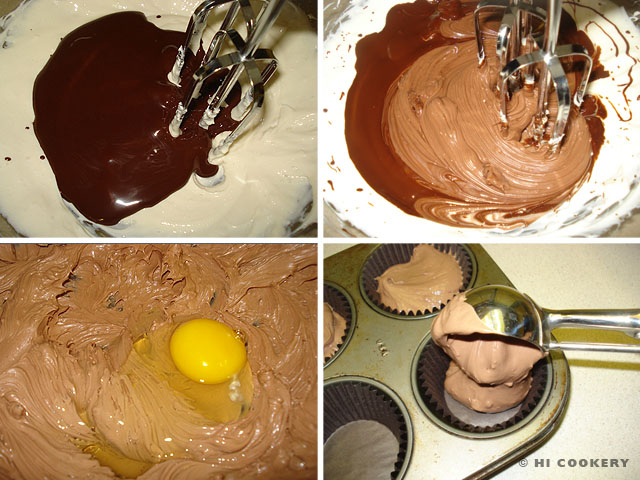
- 1 egg
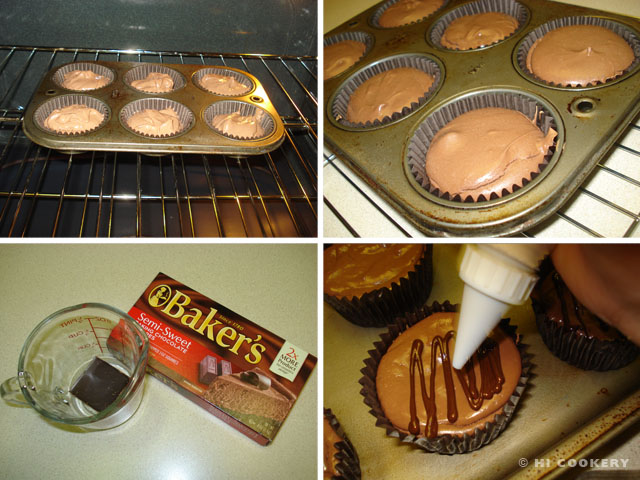
- 1 ounce/square of semi-sweet or milk chocolate, melted
Directions
In a microwave-safe bowl, break the bittersweet chocolate into small pieces. Melt according to the manufacturer’s directions. Stir until smooth. Set aside to cool slightly. In a mixing bowl, beat the cream cheese with the sugar.
Stir in the melted chocolate until well-incorporated. Add the egg to the batter. Scoop into a muffin tin lined with six cupcake papers.
Bake in a preheated oven at 300 degrees F for 15-18 minutes. The bittersweet chocolate cheesecake cups will bake up smooth and shiny with a soft-set center. Remove from the oven and place on a wire rack to cool completely. Cover with plastic wrap and chill in the refrigerator to set. Melt the chocolate square according to the manufacturer’s directions. Use a spoon to drizzle back and forth over the cheesecake cups. Or place melted chocolate in a pastry/plastic bag with a small round tip/opening to decorate with drizzles. Yield: 6 bittersweet chocolate cheesecake cups.
Notes
- *White chocolate is technically not included in the traditional percentage ratings because it does not have cocoa solids. However, it has a cacao percentage from cocoa butter ranging from 38%-41%.
- A variation of this recipe includes adding an Oreo cookie or chocolate wafer in the bottom of the muffin cups before pouring in the batter as a textured base for a mini pie or tartlet-like deesert.
- Chow down on more chocolate and cheesecake!!! Search our blog for other chocolate and cheesecake recipes.
January 8, 2013
Elvis Cupcakes
January 8: Elvis Presley’s Birthday (1935)
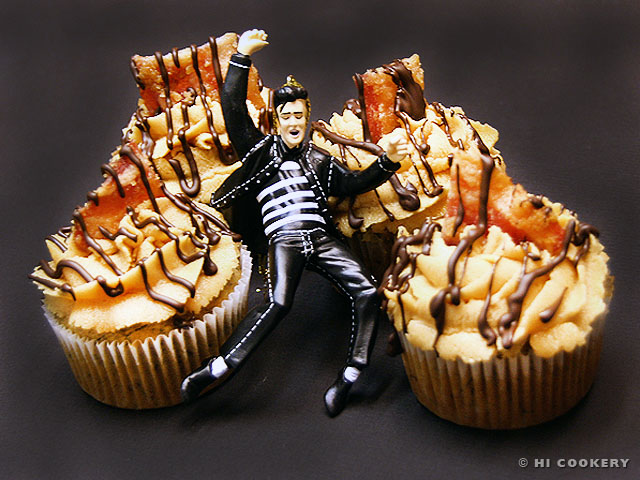
Long live the king! If Elvis Presley sounds like music to your ears, then you ought to try something that appeals to your other senses, like your tastebuds, and eat an Elvis cupcake.
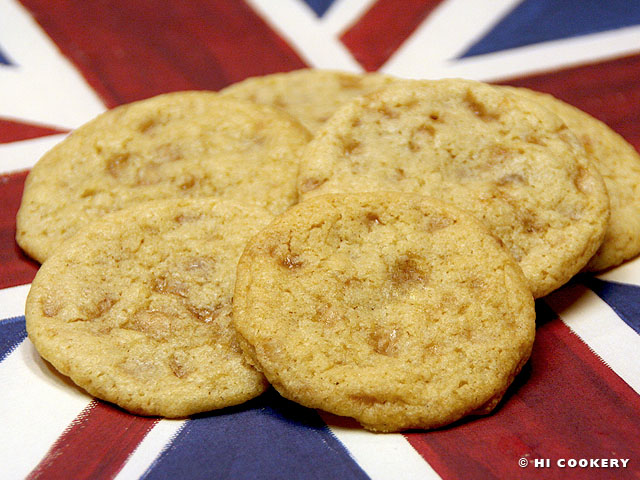
Elvis was famous not only for being the “King of Rock and Roll” but for popularizing his favorite peanut butter, banana and bacon sandwich. An Elvis cupcake is a variation of the Elvis sandwich. Basically it’s a banana muffin with creamy peanut butter frosting topped with caramelized bacon. Sometimes melted chocolate is drizzled on top for an unusual combination of flavors that taste surprisingly delicious.
In fact, the Elvis cupcake is king, too. The royal recipe reigns as a winner in one of the Cupcake War challenges sponsored by the Food Network. We baked our version of Elvis cupcakes in honor of his birthday. And just like the king, they rock!!!
Recipe
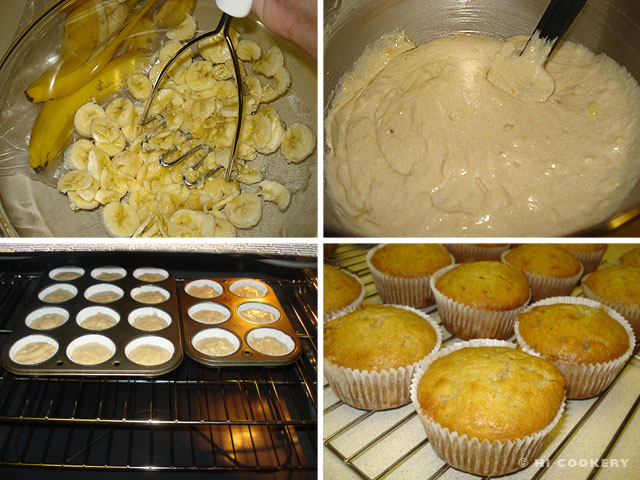
For the banana cupcakes
Refer to our blog recipe post for the banana bread ingredients and directions but omit the nuts and divide the batter into 18 muffin cups. Bake in a preheated oven at 350 degrees F for 30 minutes. Let cool on a wire rack.
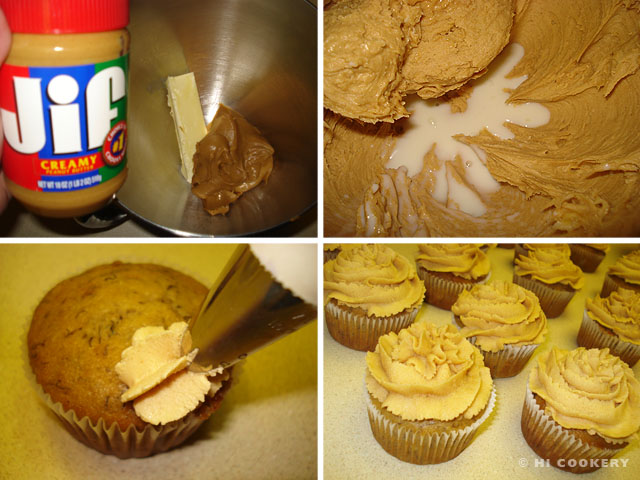
For the peanut butter frosting
(Adapted from The Cake Mix Doctor by Anne Byrn)
- 1 cup peanut butter (do not use natural)
- ½ cup (1 stick) butter, softened
- 2 teaspoons vanilla
- 2-3 cups powdered sugar, sifted
- 2+ tablespoons milk
Directions
In a large mixing bowl, cream the peanut butter with the butter until smooth. Stir in the vanilla. Gradually add the powdered sugar. Thin with milk for a spreadable consistency. Frost the cupcakes with a spatula or use a pastry bag and tip (we used Wilton 1M) to pipe decorative swirls on top.
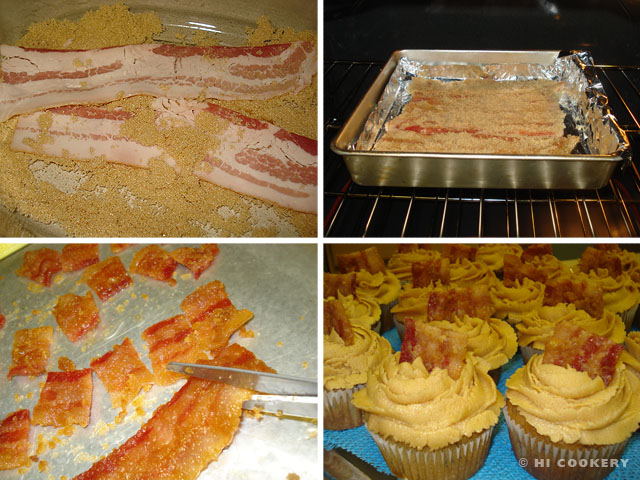
For the caramelized bacon
- 4-5 pieces of bacon
- 1 cup brown sugar
Directions
Line a baking pan with foil for easy clean up. In a flat dish, sprinkle the brown sugar. Coat each piece of bacon on both sides with the brown sugar. Lay the bacon in the baking pan side by side. Bake in a preheated oven at 400 degrees F for 15 minutes or until the bacon is cooked through. Be careful not to burn the sugar or bacon. Remove from the oven and transfer the bacon immediately to a sheet of waxed paper. Allow to cool and caramelize. Cut the bacon into smaller pieces. Top each cupcake with a piece of bacon.
For the chocolate drizzle
- ½ cup chocolate chips or 4 ounces/squares of semi-sweet chocolate
Melt the chocolate according to the package directions. Allow the melted chocolate to cool slightly. Fill a plastic zipper top bag with the chocolate and snip a little hole in the corner. Or fill a pastry bag fitted with a small round decorator’s tip. Drizzle the melted chocolate over the cupcakes. Store the cupcakes at room temperature until ready to serve. Yield: 18 cupcakes
Notes
- For a quicker step and more pronounced bacon flavor, sprinkle bacon pieces (found in the salad dressing section of the grocery store) on top of the cupcakes in lieu of garnishing them with caramelized bacon.
- Some people might not be too adventurous in eating caramelized bacon. So top the Elvis cupcakes with a piece of sweetened banana chip instead.
- Chocolate drizzles may be substituted with mini chocolate chips, chocolate jimmies or chocolate shavings.
- The ornament used in the final food photo above is from Islander’s Mommy’s Elvis collection. She is a huge fan of Elvis and has even toured Graceland, Elvis Presley’s home in Tennessee!
January 8, 2013
Brickle Drop English Toffee Cookies
January 8: English Toffee Day
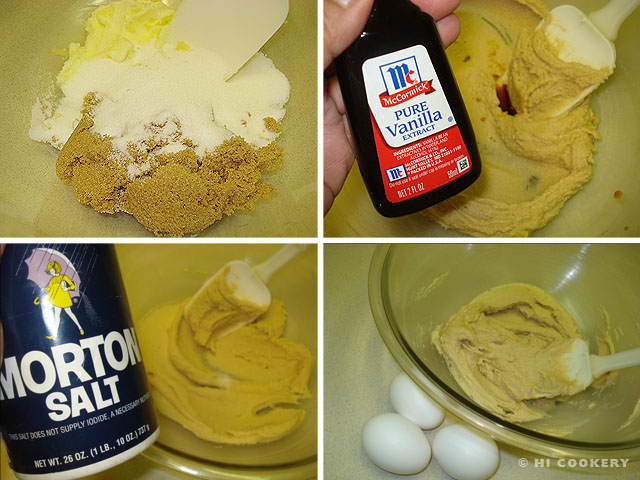
When browsing through the British Isles food booths at cultural and Celtic festivals and fairs in the states, we like to sample different sweets, such as cookies, tablets and toffees. Sometimes the latter is too sweet even for our sweet tooth. But a little bit ‘o brickle in biscuits is delicious. For an even tastier toffee treat, we dip chewy cookies in chocolate and sprinkle the crunchy pieces on them. Either way, Brickle Drop English Toffee Cookies are great for observing English Toffee Day!
Recipe
(Adapted from Hershey’s)
Ingredients
- 1 cup (2 sticks) butter, softened
- 1 cup sugar, granulated white
- 1 cup brown sugar
- 1 teaspoon vanilla
- ½ teaspoon salt
- 3 eggs
- 3 ½ cups flour
- 2 teaspoons baking soda
- 2 teaspoons cream of tartar
- 1 1/3 cups (8-ounce package) English toffee bits (Heath Bits ‘O Brickle)
Directions
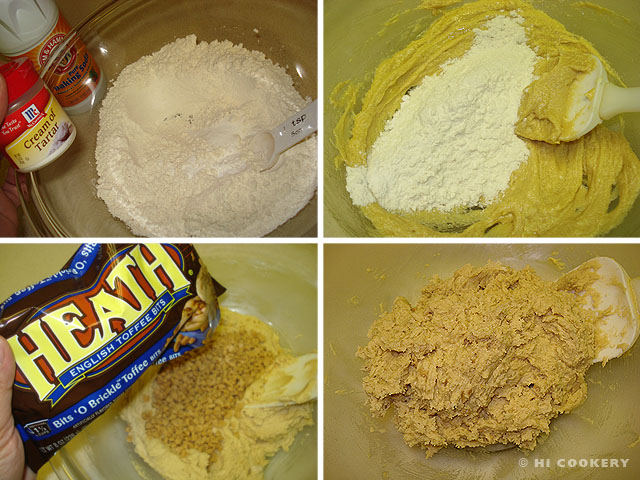
In a large bowl, cream the butter with the sugars. Stir in the vanilla. Sprinkle the salt. Beat in the eggs.
In another bowl, combine the flour, baking soda and cream of tartar. Gradually add this to the butter mixture and blend well until a sticky dough forms. Fold in the English toffee bits.
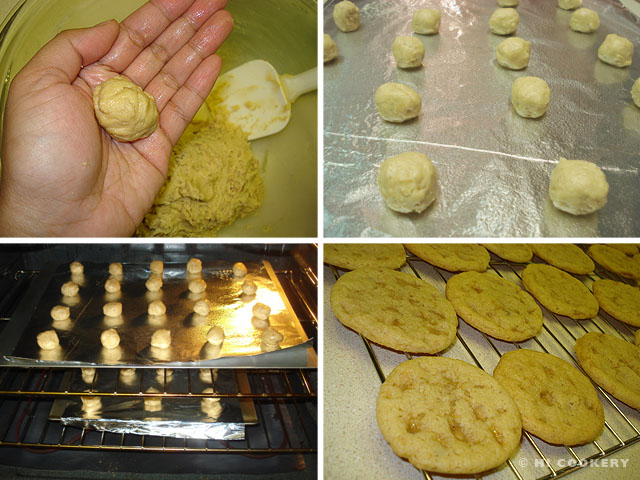
Roll the dough into one-inch balls and place on a foil-lined, lightly-greased cookie sheet. Space the balls about two inches apart to allow the cookies to spread while baking. Bake in a preheated oven at 350 degrees F for 10-12 minutes. Remove from the oven and let cool on the cookie sheet for about five minutes before transferring to a wire rack to cool completely. Yield: Approximately 6 dozen cookies.
Notes
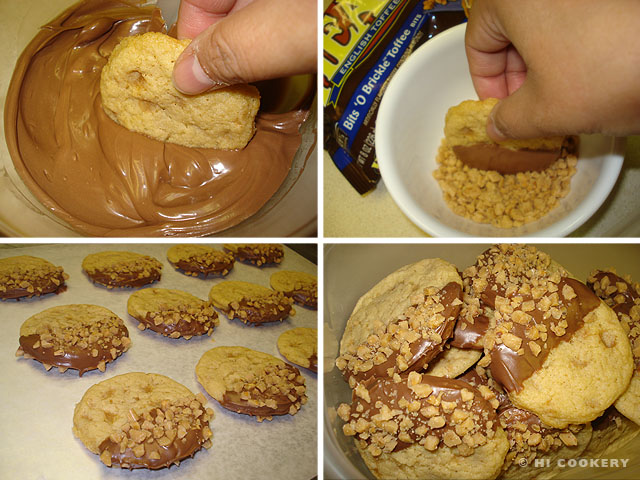
- Cookies may be dipped partly in melted chocolate. Sprinkle some English toffee bits on it before the chocolate hardens. Lay on waxed paper (but do not stack the cookies) to allow the chocolate to set. Arrange on a platter to serve.
« Previous Page — Next Page »
