February 2016
Monthly Archive
February 6, 2016
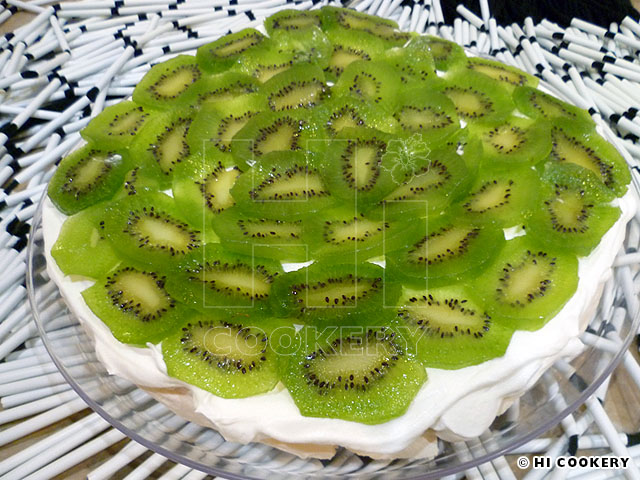
Kiwi Pavlova
February 6: Waitangi Day (New Zealand)
We met our wedding godparents, Drs. Mark and Natalie R., in a Midwest college town where he was a chemistry professor and we were graduate students at the same university. God brought all of us together somehow from different parts of the globe—Highlander from Canada, Islander from Hawaii, Godfather Mark from New Zealand/Aotearoa and Godmother Natalie from France—when we attended services at a small, new church (Highlander and Islander were the music ministers). Mark and Natalie frequently invited us to their home to enjoy home-cooked Sunday meals with their teen daughters when the cafeterias on campus were closed. We enjoyed the company as well as the delicious dinners—and, of course, the desserts, often something sweet and simple, like pavlova, a popular treat from Mark’s country.
Pavlova is a light and airy meringue smothered in whipped cream and topped with fresh fruit. We decorated ours with slices of native New Zealand kiwi only since passion fruit was not available at the time. Pavlova is a wonderful treat on Waitangi Day or any time one wants a delightful dessert.
Recipe
From Drs. Mark and Natalie R.
Ingredients
- 3 egg whites, room temperature
- 3 tablespoons water, cold
- 1 cup sugar, granulated white
- 1 teaspoon vinegar
- 1 teaspoon vanilla
- 3 teaspoons corn starch
- 1-2 cups sweetened whipped cream, cold
- 3-5 fresh kiwis, sliced
Directions
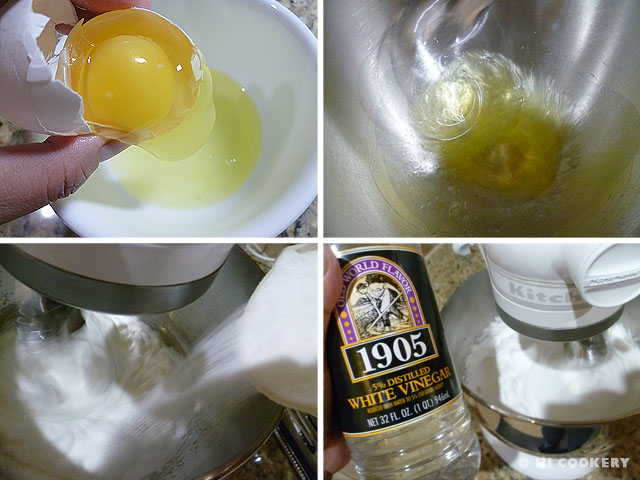
In a grease-free cold bowl, beat the egg whites until fluffy. Add the water and beat again. Gradually add the sugar while beating. Add the vinegar, vanilla and cornstarch.
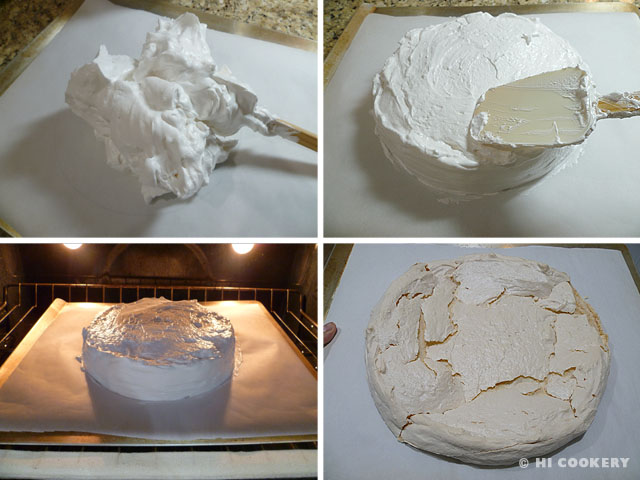
Lay parchment paper on a baking sheet. Spread the meringue into a circle shape (8-10 inches in diameter) on the parchment paper. Bake in a preheated oven at 300 degrees F for 45 minutes. Turn off the oven, crack the door slightly open and leave the meringue inside until cool. Remove from the oven.
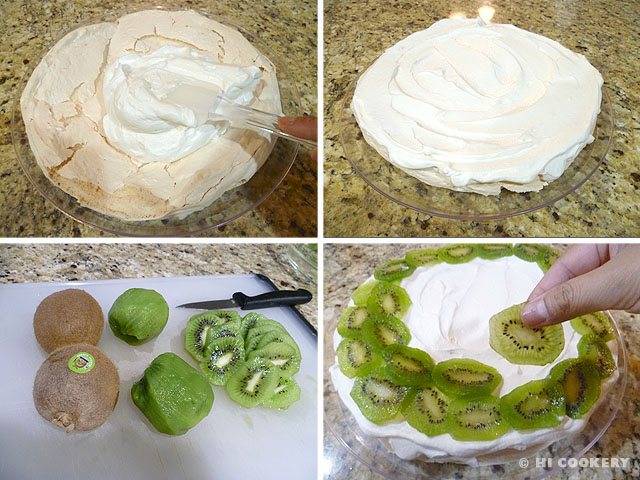
When ready to serve, spread sweetened whipped cream over the top of the meringue. Add slices of fresh kiwis to cover the meringue. Slice and serve immediately.
Notes
- The kiwi pavlova in the food photo above is resting on Islander’s traditional Maori skirt. She learned how to twirl poi balls while taking hula and Tahitian dance classes when she was younger.
- Room temperature instead of cold egg whites beat fluffier and fuller.
- The meringue can stay crisp on the outside and chewy in the inside if covered in an airtight container until ready to serve. Spread the cream and fruit just before ready to serve to avoid a soggy meringue.
- Feel free to add other fresh fruits, such as passion fruit (lilikoi in Hawaiian), berries, citrus, mango slices, etc.
February 3, 2016
Elmo Candy

February 3: Elmo’s Birthday
Happy birthday to Islander’s favorite furry friend—Elmo! She adores the Sesame Street character so much that she was inspired to try a candy decoration project to mark her muse’s special day. It is a simple sugar arts technique that involves tracing and flooding over a pattern. The finished candy piece may be eaten as is or used as a cake decoration.
Elmo was a simple pattern with a few candy melt colors that Islander had on hand for her first candy project. Other clipart or coloring page patterns and chocolate or candy melt colors may be used—the possibilities are endless for a fun and personalized project. But for today, enjoy an edible Elmo on his birthday.
Recipe
Ingredients
- Black (or dark chocolate) candy melts
- Red candy melts
- Orange candy melts
- White (or white chocolate) candy melts
Directions
Print out a clipart or coloring page of Elmo. Put the image on a cake board, cardboard or cutting board. Tape waxed paper over it. Melt the black or dark chocolate candy melts. Let cool slightly. Fill a piping bag outfitted with Wilton tip #3. Trace the outline of Elmo, flooding the mouth area. Refrigerate for a few minutes until the candy is set.
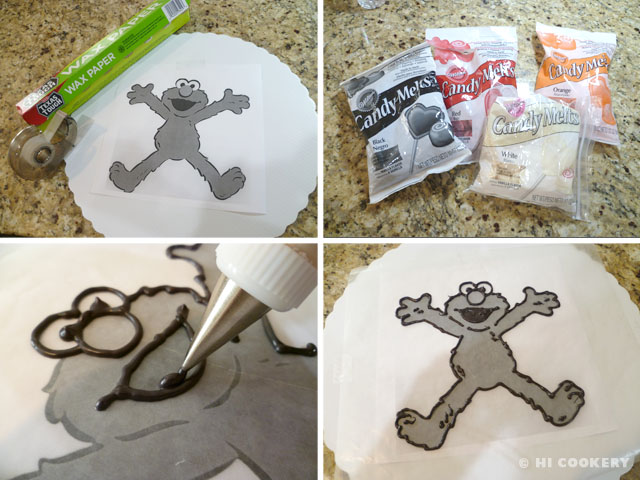
Melt the red candy melts. Let cool slightly. Fill a piping bag outfitted with Wilton tip #3. Flood the body area. Do the same for the nose using the orange candy melts.

Melt the white chocolate candy melts. Let cool slightly. Fill a piping bag outfitted with Wilton tip #3. Flood the eye area. Refrigerate for a few minutes until the candy is set.

Use the remaining melted white chocolate candy melts to trace all over Elmo’s body and flood the area completely. This makes the overall candy sturdier. Go ¼-inch past the edges with an outer outline (optional). Refrigerate for a few minutes until the candy is set. Remove the tape from the wax paper. Turn the hardened candy Elmo over on the flat surface. Carefully peel away the waxed paper. Cover with plastic wrap until ready to serve or decorate a cake.
February 1, 2016
Avocado-Mushroom-Onion Omelet
February: National Avocado Month
Islander was so shy in kindergarten when students were asked to name a fruit during a food lesson. All the other classmates stated the obvious—apples, bananas, oranges—and local Hawaiian favorites—coconuts, pineapples, papayas, mangos, lychees, lilikoi, etc. She regrets not having spoken up and saying “avocado” especially since her family had an avocado tree in the back yard of her childhood home in Pearl Harbor that was located across the street from the school!
Now, 40+ years later, Islander is using this blog as a medium to say that avocado is botanically a fruit. But because it is green and used in many savory recipes, many might confuse it as a vegetable.
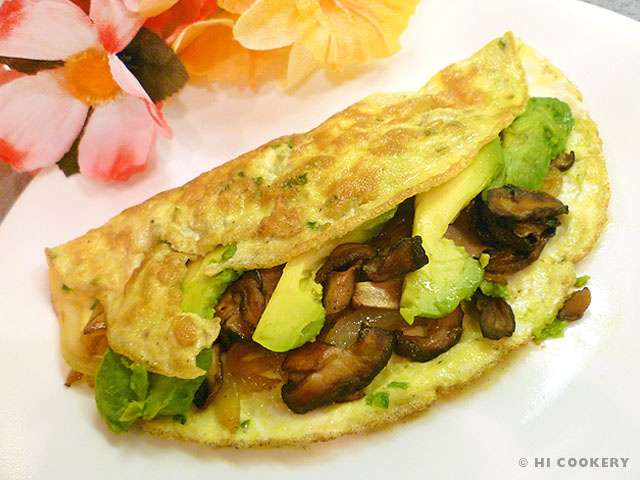
In observing National Avocado Month, we put avocado slices in an omelet filled with mushrooms and caramelized onions for a hearty and healthy brunch. Celebrate February with a fruit and add an avocado to an omelet!
Recipe
(Adapted from Williams-Sonoma)
Ingredients
- Olive or vegetable oil
- 1 small onion, sliced
- ¼ cup water
- salt and pepper to taste
- 1 cup mushrooms (we used oyster), sliced
- 4 eggs beaten with 2 tablespoons water
- 2 tablespoons fresh chives, sliced
- 1 avocado, peeled, pitted and sliced into wedges
Directions
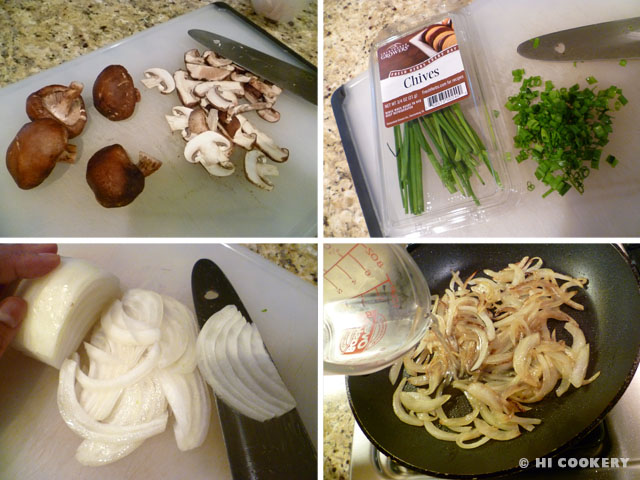
Slice the mushrooms, chives, onion and avocado. In a skillet, sauté the onions in 1 tablespoon of oil over medium-high heat. Stir occasionally until caramelized (around 10 minutes). Add the water to deglaze. Season with salt and pepper. Transfer to a plate and set aside.
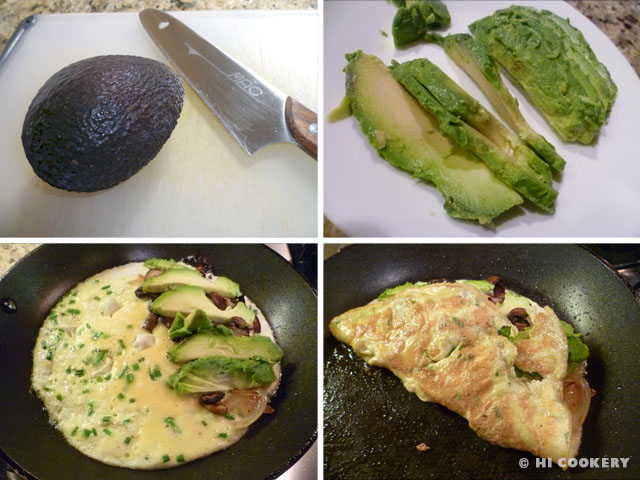
In the same skillet, heat another tablespoon of oil and add the mushrooms. Cook for about 5-7 minutes or until browned. Season with salt and pepper. Transfer to a plate and set aside. Wipe down the skillet and heat with 1 teaspoon of oil. Pour in half the beaten egg-water mixture and swirl around to cover the bottom of the skillet. Sprinkle in the chives. Cook for about a minute or two. On one side of the omelet, sprinkle half the onions and mushrooms.

Fan out the avocado slices on top. When the eggs are slightly set, fold the other side of the omelet over the filling. Slide the omelet onto a plate and keep warm. Repeat the process for the second omelet. Yield: 2 servings.
Notes
- Sprinkle a little lemon juice on the avocado slices to prevent browning after cutting.
- Search our blog for additional avocado recipes.
« Previous Page
