Coffee and Nut Cookies

 Coffee and Nut Cookies

September 29: National Coffee Day

We have visited coffee plantations and estates while in Kona (Big Island of Hawaii), Kualapuu (Molokai), Kalaheo (Kauai) and Waialua (Oahu, Islander’s home island). We even got to sample some of the peaberries (bitter yet aromatic) grown on the property of some of the Hawaiian coffee companies. We buy their products and take them back to the mainland so Highlander can enjoy a cuppa joe (or, in Hawaiian, kope), and Islander can bake coffee-flavored desserts, such as coffee and nut cookies.

Hawaiian Coffee - HI Cookery

Inspired by Kauai Kookie’s Kona coffee macadamia nut shortbread cookies, Islander used Hawaiian ingredients in a simple coffee cookie recipe to give it a tropical twist. Coffee lovers will definitely appreciate these flavorful treats. So celebrate National Coffee Day and bake a batch of coffee and nut cookies with a little aloha!

Recipe

(Adapted from Ferra Coffee) 

Ingredients

  • ½ cup vegetable shortening
  • 2/3 cup sugar (we used C&H brand), granulated white
  • 2 tablespoons roasted ground coffee (we used Hawaiian Kona coffee)
  • 1 egg
  • ¾ cup flour
  • ½ teaspoon vanilla extract (we used Hawaiian Vanilla Company brand) 
  • ½ cup chopped nuts (we used Mauna Loa macadamia nut pieces)

Directions

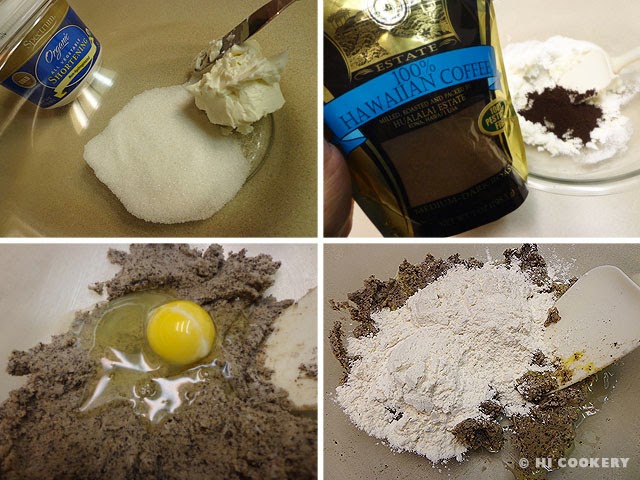
In a large bowl, cream the shortening with the sugar. Mix in the ground coffee. Beat in the egg. Add the flour.
Coffee and Nut Cookies

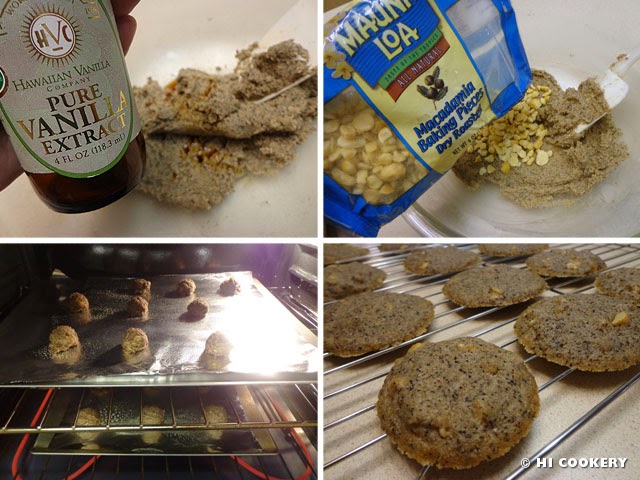
Mix in the vanilla and nuts. Blend well until cookie dough forms. Use a small scoop to drop the dough at least two inches apart onto greased cookie sheets. Bake in a preheated oven at 350 degrees F for 10-12 minutes. Remove from the oven and cool to a crisp on wire racks. Yield: Approximately 1 ½ dozen coffee cookies. 
Coffee and Nut Cookies

Notes

  • These cookies spread while baking and are soft when they come out of the oven. When cool, the edges become crisp while the center is somewhat chewy.
  • Search our blog for recipes containing coffee as an ingredient. Also peruse for more posts on other cookie recipes.
Carlota de Limón

Carlota de limon

September 16: Mexican Independence Day

Although Cinco de Mayo (5th of May) is a popular holiday associated with Mexico, el Dieciséis de Septiembre (16th of September) is seen as more important. Whereas May 5 commemorates the victory of the Mexican army over Napoleon’s French troops/invaders in 1862, September 16 marks Mexico’s declaration of independence from Spain in 1810. Either date is cause for celebration, especially in South Texas where we have many Mexican friends and neighbors. From them we have learned a little bit about their Hispanic heritage as well as some of the foods they prepare for special events.

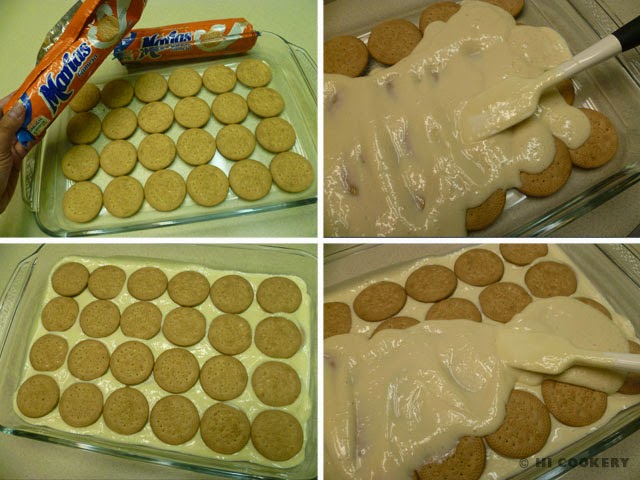
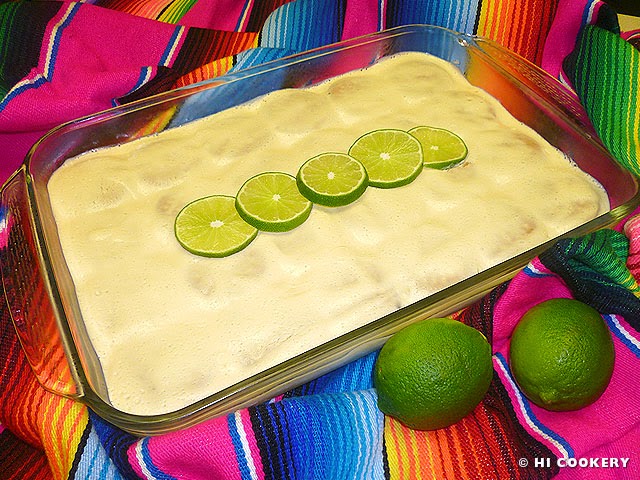
Carlota de limón (also called postre de limón) is one of the quick and easy recipes they have shared with us. It is like a trifle that consists of alternating layers of cookies and a creamy lime filling. This makes for a delicious dessert for Dieciséis de Septiembre and during other Mexican holidays.

Recipe

Ingredients

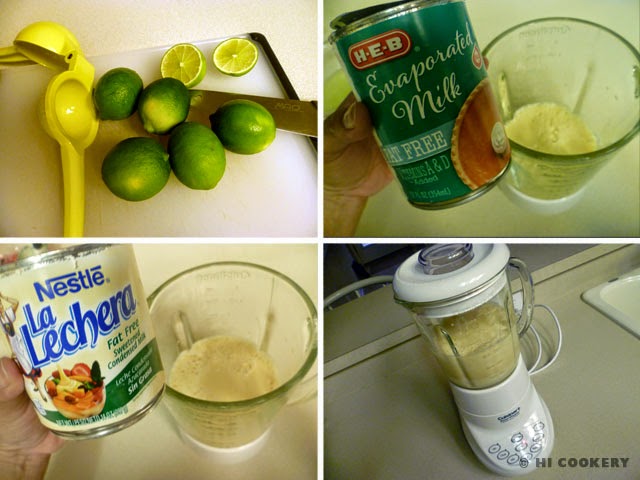
  • ½ cup lime juice (from approximately 6-7 fresh squeezed limes)
  • 1 can (12 ounces) evaporated milk
  • 1 can (14 ounces) sweetened condensed milk
  • 2 rolls/packages of Maria Mexican cookies
  • sliced limes (optional garnish)

Directions

Juice the limes. Place the juice with the evaporated and condensed milks in a blender. Blend until smooth.

Carlota de limon

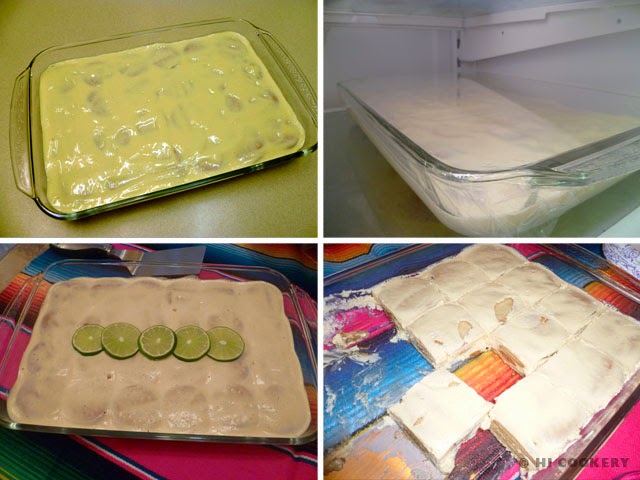
In a large glass casserole dish, layer the cookies. Pour 1/3 of the lime-milk mixture over the cookies and spread to cover them. Arrange more cookies on top. Pour another layer of the lime-milk mixture over it and spread to cover them. Arrange the last layer of cookies and finish spreading the lime-milk mixture over it.

Carlota de limon

Cover with plastic wrap and refrigerate for at least three hours or overnight to allow the cookies to soften, the lime-milk mixture to solidify and the flavors to develop. Before serving, garnish with limes (optional). Cut into 24 squares.

Carlota de limon

Notes

  • Some recipes add a cup of softened whipped cream cheese to make the filling fluffier and thicker.
  • Pipe a pretty border with whipped cream to decorate the edges (optional).
  • Happy Hispanic Heritage Month to all our friends from Latin America!

A+ Apple Cookies

Apple Cookies

August: Back-to-School Season

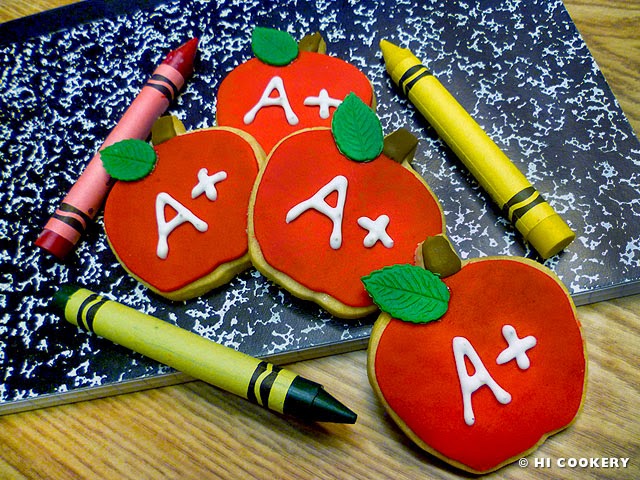
Get an A+ for your efforts in making adorable apple cookies for a back-to-school snack. We baked and decorated apple cookies for a college crowd and they were a hit (of course, most students will eat anything that’s free)! The sugar cookie dough we use yields around four-dozen two-inch shaped apple cutouts so there are a lot to share for a class en masse. These apple cookies are crisp, cute and colorful and are a festive food to serve at back-to-school events and even during National Apple Week (second week of August).

Recipe

(Adapted from Kitchen Lane)

Ingredients

  • 3 cups flour (all purpose white)
  • 3/4 teaspoon baking powder
  • ½ teaspoon salt
  • 1 cup (2 sticks) unsalted butter, slightly softened
  • 1 cup granulated sugar
  • 1 egg
  • 1 tablespoon milk
  • 3 teaspoons vanilla extract
  • red and green fondant
  • powdered sugar for dusting the surface
  • clear piping gel or water
  • chocolate brown frosting (for the apple stems)
  • white frosting (for “A+” lettering)

Directions

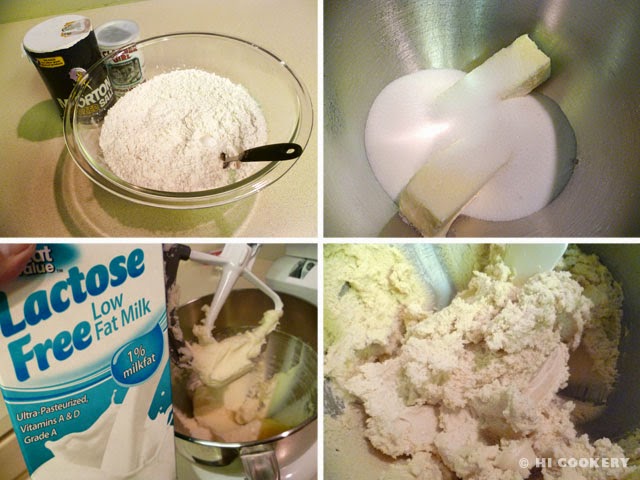
In a large bowl, stir together the flour, baking powder and salt. In another bowl, mix together the butter and sugar until creamy. Beat in the egg, milk and vanilla. Gradually add the flour mixture into the other ingredients and blend well to form a dough.

Apple Cookies

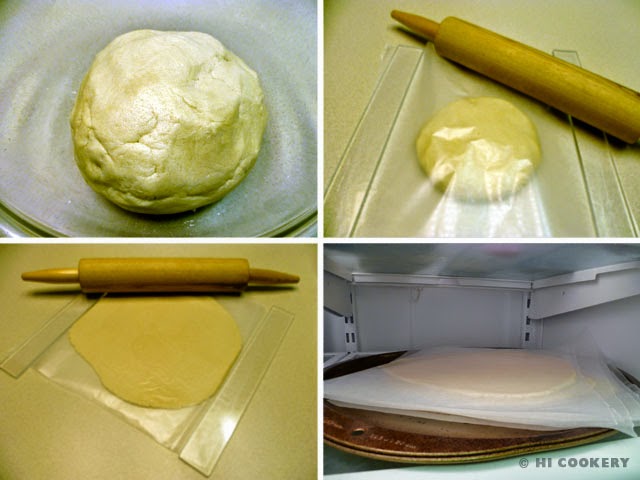
Divide dough in thirds and roll into a ball. Then flatten each ball into a disc and place between sheets of waxed or parchment paper. Roll out to about ¼-inch thick (we used ¼-inch thick acrylic sticks as guides). Stack them on a baking sheet and refrigerate until firm (about 30-45 minutes). They may also be frozen for 15-20 minutes.

Apple Cookies

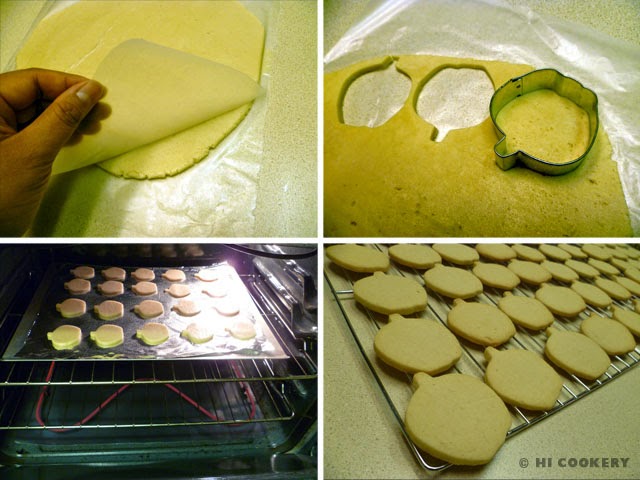
Take one stack of flattened dough out of the refrigerator or freezer. Peel away both front and back to loosen, leaving the dough on one sheet of the waxed or parchment paper. Cut out the apple shapes. Place on a foil-lined greased cookie pan about 1 ½ – 2 inches apart. Refrigerate the cookie pan. Re-roll scraps of dough and cut more shapes, refrigerating if the dough gets too soft. The dough needs to be cold and firm in order to retain its shape while baking. Bake the cookies in a preheated oven at 375 degrees F for 10-15 minutes or until the sides are very lightly browned. Remove from the oven when done and let sit on the pan for about five minutes. Transfer each cookie on a wire rack to cool completely. Store in an airtight container until ready to decorate.

Apple Cookies

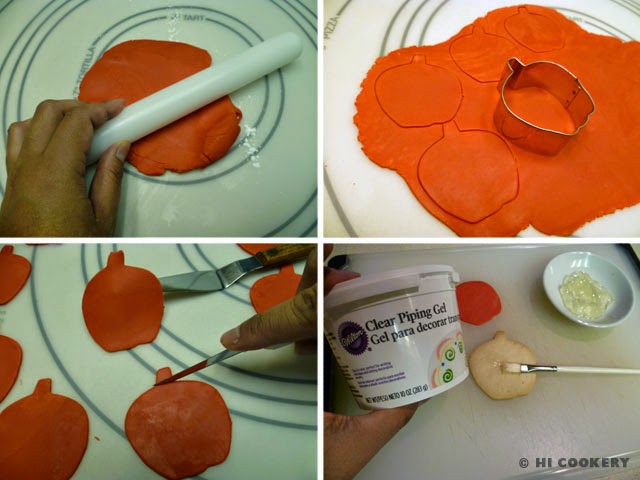
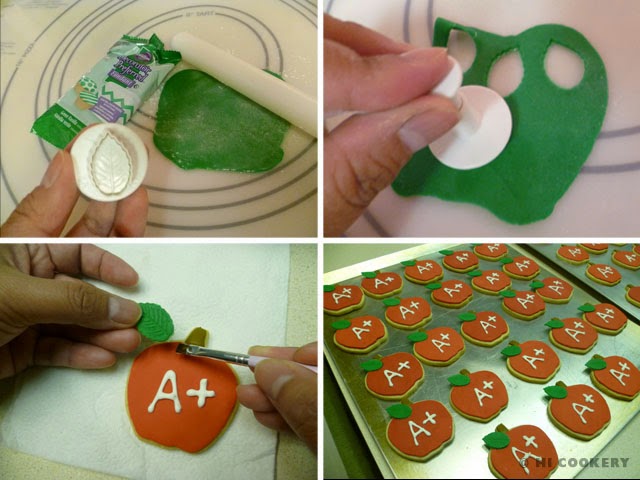
Using the same apple-shaped cookie cutter, cut out shapes on red fondant (roll out to 1/8-inch thickness on a clean surface that has been dusted with a bit of powdered sugar to prevent from sticking). Slice off the stem piece. Brush piping gel or water on the red fondant.

Apple Cookies

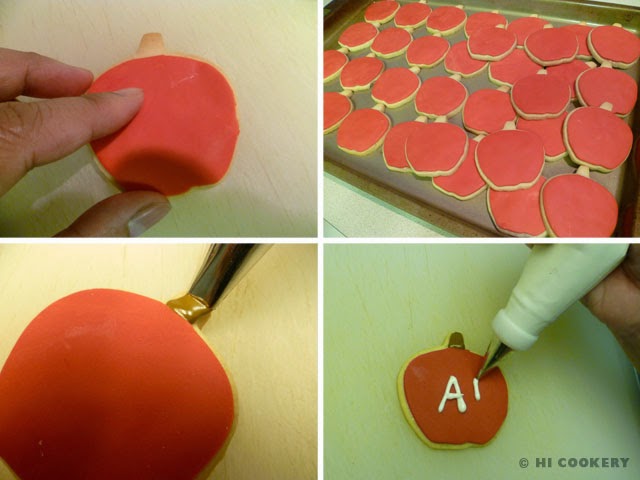
Position the red fondant on top of the apple cookie and smooth out the edges with warm fingers. Repeat for all cookies. Pipe chocolate brown frosting for the stem. Pipe “A+” on top of the apple cookies. Set aside to dry.

Apple Cookies

Make small leaves from the green fondant (we used a leaf-shaped plunger-cutter). Attach to the apple cookie with piping gel or water. Set aside to make sure all icing is dry before stacking. Store in an airtight container until ready to serve to starving students.

Apple Cookies

Notes

  • Personalize the apple cookies by piping students’ and teachers’ names or writing the name of the school on them.
  • We used fondant more than royal icing on these apple cookies because it was quicker to cut out shapes for mass production (besides, we have not mastered the “flooding” technique—yet).
  • Search our blog for other back-to-school snack recipes.