Toilet Paper Cake

October 10: National Cake Decorating Day
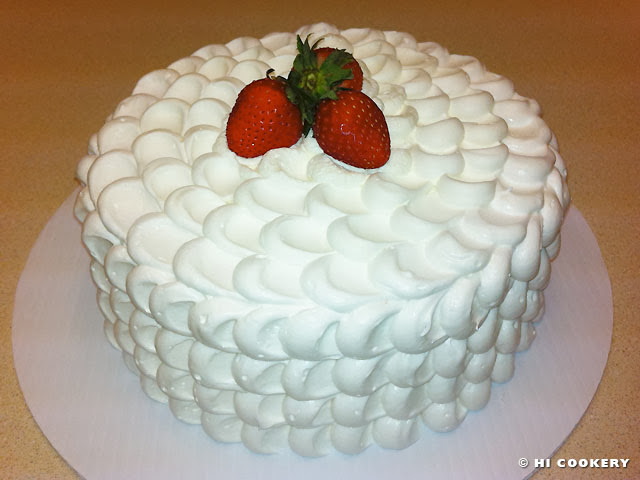
COVID-19 stinks! The global pandemic ruined many celebration plans so Islander wanted to make those “crappy” birthdays happy. She made this fake toilet paper cake for her friend, Karen B., renaming her “Karen-ovirus” on the quarantine birthday signs she also designed for the social distance celebration.

Islander picked up a real cake, a Japanese cream roll, from their mutual friend, Yukiko H., (who was pregnant at the time), at curbside, then drove to Karen’s house where her husband Ken allowed her inside their dining room to quickly decorate in a black and yellow motif, complete with caution tape, disinfecting wipes and real toilet paper. They sat on the opposite sides of the dining room, more than six feet apart, while Ken and Islander sang through their masks “crappy birthday” to Karen. She then fanned the flames from the candles—no blowing them out to prevent droplets—so everyone can eat Yukiko’s cake (she texted Karen her birthday wishes safely from home). After Karen opened her gifts from the quarantine-labeled bags, the “party” was over within half an hour. It was a short but sweet—and safe—social distance celebration.
How heartwarming it was to see a friend after several weeks in lockdown. But until there is a vaccine for COVID-19, we must continue to abide by CDC guidelines and help “flatten the curve”. When it is safe to socialize once again, then that will be a celebration in itself!
For now, make an easy toilet paper cake and learn a sugar arts skill during quarantine and on National Cake Decorating Day!
Recipe
Ingredients
- White fondant
- Black or dark brown fondant
- Powdered sugar (for dusting the work surface)
- Vegetable shortening
- Water
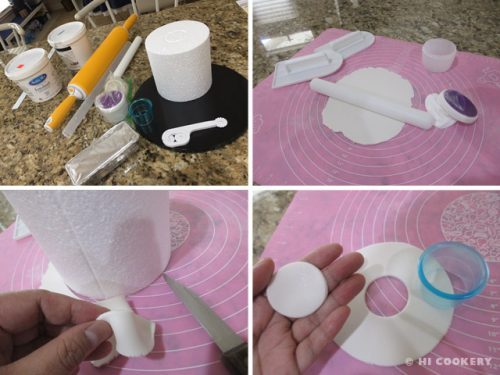
Materials
- Styrofoam cake dummy (5 inches in diameter and 6 inches tall)
- Black cake board (10 inches)
- Rolling pin
- Ruler
- Nested circle cutters
- Paint brush or water tube brush
- Fondant cutter/embosser tool
- Duct tape
- Yellow alphabet stickers
Directions
Prepare a clean work surface and dust with powdered sugar. Knead and roll out white fondant about 1/8 inch thick. Use a 5-inch round cutter for the top of the toilet paper cake. Use a 1 ¼ inch round cutter to make a hole in the middle. Set aside and keep covered to prevent the fondant from drying out.
Knead and roll out a more fondant about 1/8 inch thick. Roll a long piece to cover the sides of the styrofoam (we rolled approximately 17-18 inches long), allowing for overhang. Use a ruler and cut 6 inches wide to fit the height of the styrofoam. Smear vegetable shortening on the sides of the styrofoam. Roll it on the fondant and smooth it down to stick.

Turn the styrofoam right side up. Use a water brush to attach the end of the fondant to the other, allowing a little bit of the fondant to drape down (we forgot to “square off the end” and left it rounded). Use a fondant embosser tool and a ruler to create perforated lines on the sides. Knead and roll out a small piece of black or dark brown fondant about 1/8 inch thick. Use a 1 ¼ inch circle cutter to fill the hole of the 5-inch white fondant circle.

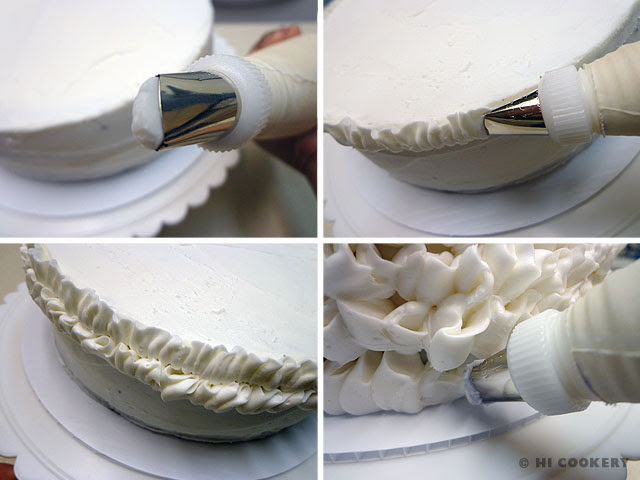
Smear a little vegetable shortening on top of the styrofoam. Press the white fondant circle on top and then the middle black/dark brown circle in the middle. Smooth out all sides of the fondant with fingers dipped in powdered sugar. Using nested cutters, lightly press rounds on top to create texture. Place a piece of duct tape under the finished styrofoam and position it on the black cake board. Brush a little water underneath the overhanging fondant to stick to the board. Use yellow alphabet stickers to spell out a message. Surround the finish piece with real toilet paper and empty rolls.

Notes
-
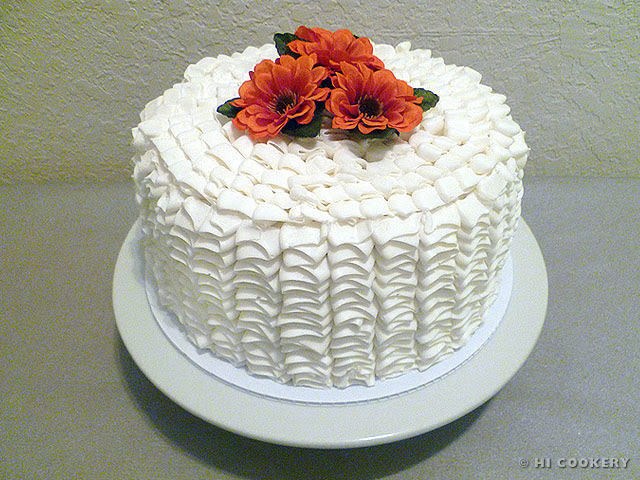
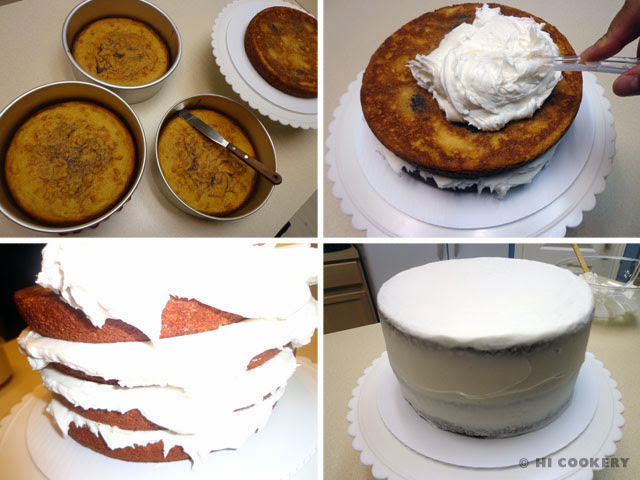
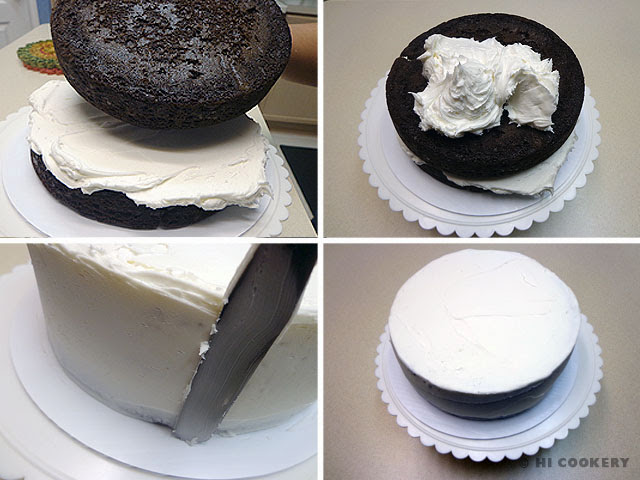
Instead of a styrofoam cake dummy, bake a real cake using 3-4 round layers about 5-6 inches in diameter. Frost and fill between the layers and crumb coat the sides with vanilla icing before applying the fondant.
-
Islander was fortunate that she had all the cake decorating supplies already. Some were gifts from friends, others were already purchased from the shops and the rest were swag bag samples from the sugar arts shows that she had attended pre-covid. This toilet paper cake was meant to be a fun project to try during quarantine.
- Search our blog for other cake decorating ideas.