Pumpkin Soup
October 31: Halloween
Halloween night is always a busy time. But we always want to have something festive to make and eat for dinner before taking the “kids” (Islander’s senior citizen parents) out for trick-or-treating a look around our neighborhood where the homes go all out with decorations.

This pumpkin soup is easy to make and, when served with buns or bread, can be a quick and simple meal to feed our little family for the fun night around the neighborhood. It is a healthy choice and not a heavy dinner to weigh us down while walking and enjoying the sights. The ingredients are full of fall flavors: apples, warming spices and, of course, pumpkin!
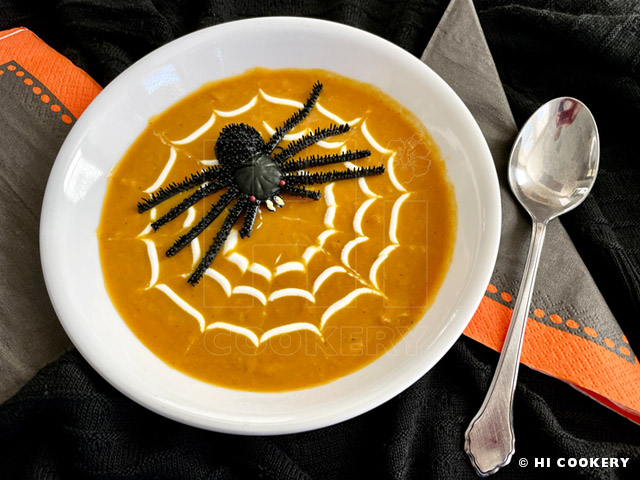
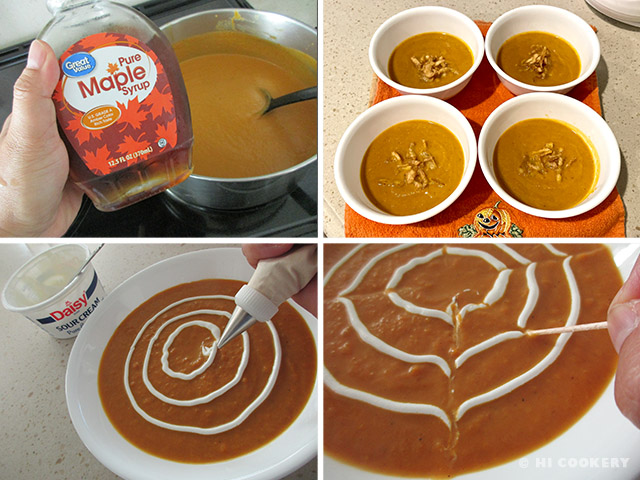
And inspired by the houses we see, we add an EXTRA decoration to our soup—instead of a dollop of sour “scream”, we drizzle concentric circles on top and use a toothpick to pull out a spider web design.
Serve up some spooky spiced pumpkin soup for a simple Halloween meal.
Recipe
(Adapted from Two Peas and Their Pod)
Ingredients
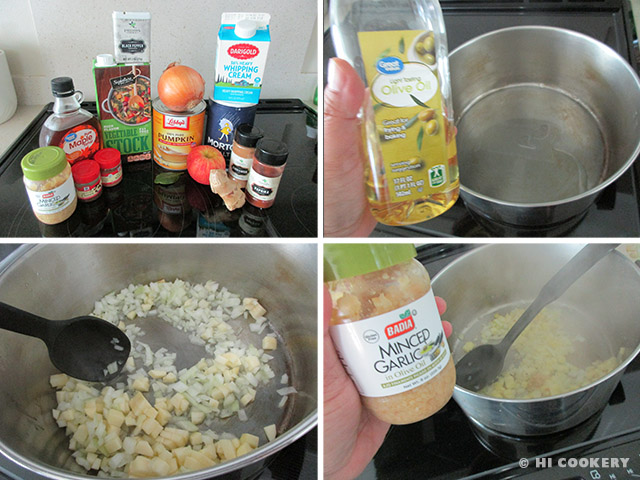
- 2 tablespoons oil
- 1 small onion, chopped
- 1 apple, peeled, cored, seeded and chopped
- 1-2 teaspoons minced garlic
- 1 bay leaf
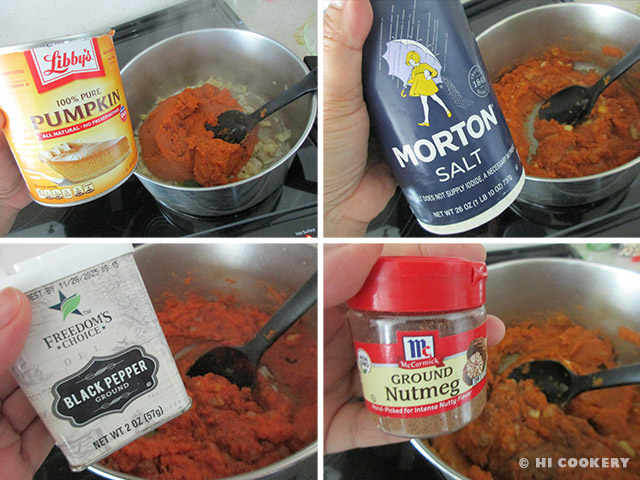
- 1 can (29 ounces) pumpkin puree
- Salt and pepper to taste
- ½ teaspoon ground nutmeg
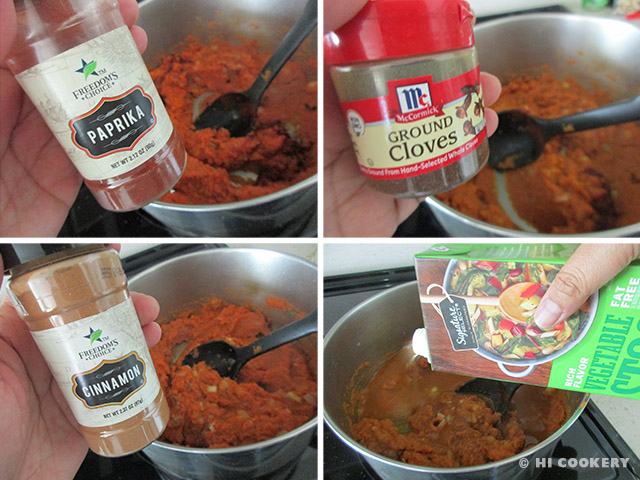
- ½ teaspoon paprika
- 1/8 ground cloves
- ½ teaspoon ground cinnamon
- 4 cups vegetable broth
- 2 tablespoons pure maple syrup
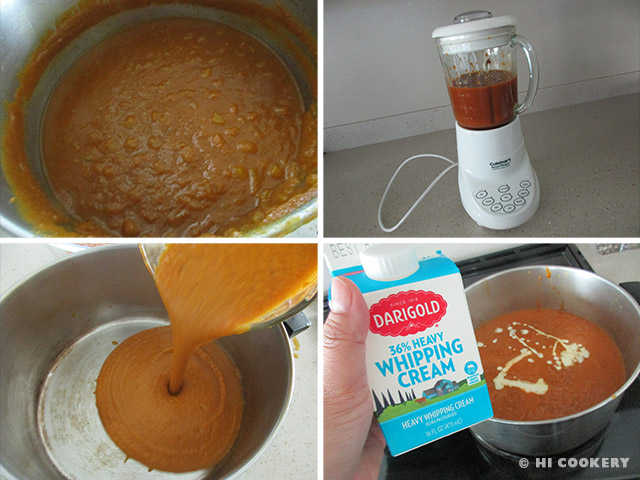
- ½ cup heavy cream
- Sour cream, optional garnish
Directions
Heat oil in a large pot over medium high heat. Saute the onions and apples for around 5 minutes or until softened. Add the minced garlic and continue sauteing until fragrant. Add the bay leaf.
Pour in the pumpkin puree. Season with salt and pepper. Add the spices (nutmeg, paprika, cloves and cinnamon). Stir in the vegetable broth.
Mix and lower heat to simmer for 10 minutes. Discard the bay leaf. Transfer to a blender (or use an immersion blender) and blend until liquefied. Pour soup back into the pot. Stir in the heavy cream and maple syrup.
Ladle into bowls and serve hot. For the optional spider web decoration, fill a piping bag with sour cream and draw concentric circles on the soup. Use a toothpick to pull outward designs. Garnish with a toy spider (remove before eating). Store cooled soup in containers.
Notes
- Thanks to our friend Karen B. who gave us the Two Peas and Their Pod cookbook. Culinary and cake club members often referred to Islander and Karen as two peas in a pod because they played/worked so well together in their pods (kitchens).
- Heavy cream may be substituted for coconut milk in this recipe.
- If not decorating with a sour cream spider web design, sprinkle toasted pumpkin seeds on the soup.
- Try another spiced pumpkin soup recipe that we made for National Pumpkin Day on October 26.
- Search our blog for more Halloween recipes.